Home>Home Security and Surveillance>How To Set Up Outdoor Camera Surveillance

Home Security and Surveillance
How To Set Up Outdoor Camera Surveillance
Modified: March 6, 2024
Learn how to set up outdoor camera surveillance for your home security and surveillance needs. Protect your property with expert tips and advice.
(Many of the links in this article redirect to a specific reviewed product. Your purchase of these products through affiliate links helps to generate commission for Storables.com, at no extra cost. Learn more)
Introduction
Welcome to the world of outdoor camera surveillance! Whether you are looking to protect your home, monitor your property, or keep an eye on your business, setting up a reliable and effective outdoor camera surveillance system is essential. In today’s rapidly evolving technology landscape, there are a wide variety of options available to suit different needs and budgets.
Outdoor camera surveillance systems provide an extra layer of security and peace of mind by capturing video footage of activities outside your property. This can help identify potential intruders, document incidents, and act as a deterrent against criminal activities. Additionally, outdoor cameras can be used to monitor the safety of children and pets, keep an eye on deliveries, and ensure the overall well-being of your property.
Before diving into the installation and setup process, it’s important to consider a few key factors. First and foremost, you need to choose the right outdoor camera surveillance system that meets your specific requirements. This includes factors such as image quality, camera type, night vision capabilities, weather resistance, storage options, and remote access features.
Once you have selected your outdoor camera surveillance system, the next step is to plan the camera placement strategically. This involves identifying vulnerable areas, determining optimal angles and distances, and ensuring proper coverage of the entire outdoor space. Planning camera placement plays a crucial role in maximizing the effectiveness of your surveillance system and minimizing blind spots.
With your camera placement plan in hand, it’s time to move on to the installation process. Installing outdoor cameras requires some technical knowledge and skills. You’ll need to mount the cameras securely, run power and data cables (if wired), or connect wirelessly (if using wireless cameras). Proper installation ensures stability, durability, and optimal functioning of the cameras.
After installing the cameras, you need to adjust various settings to optimize their performance. This includes configuring video quality, motion detection sensitivity, notification settings, and scheduling recording times. Fine-tuning these settings ensures that your cameras capture the necessary footage without overwhelming you with unnecessary alerts or recordings.
In order to effectively monitor and manage your outdoor camera surveillance system, you’ll also need to connect it to a monitoring system. This can be a dedicated network video recorder (NVR), a cloud-based storage service, or even your smartphone or computer through a surveillance app. Connecting your system to a monitoring system allows you to view live footage, review recorded videos, and receive notifications on any device, from anywhere.
Lastly, it is essential to test your outdoor camera surveillance system and troubleshoot any issues that may arise. This includes checking the camera feeds, testing motion detection, verifying the recording functionality, and ensuring remote access is working smoothly. Regular testing and maintenance ensure that your system remains in optimal working condition and provides reliable security.
Setting up your own outdoor camera surveillance system may seem daunting at first, but with the right knowledge and guidance, it can be a rewarding and empowering experience. By following the steps outlined in this article, you will be well on your way to having a robust and effective outdoor camera surveillance system in place to protect and monitor your property.
Key Takeaways:
- Choosing the Right System
Select outdoor cameras with high image quality, weather resistance, and remote access. Consider wired vs. wireless options and integration with existing security systems. Research and read customer reviews for reliable brands. - Strategic Placement and Testing
Plan camera placement to cover vulnerable areas and avoid obstructions. Test live feeds, motion detection, and remote access for optimal functionality. Regularly maintain and update the system for continued reliability.
Read more: How To Set Up An ADT Outdoor Camera
Choosing the Right Outdoor Camera Surveillance System
When it comes to outdoor camera surveillance systems, there is a wide range of options available in the market. Choosing the right system is essential to ensure that it meets your specific needs and provides the level of security you require. Here are some key factors to consider when selecting an outdoor camera surveillance system:
- Image Quality: Look for cameras that offer high-resolution imaging capabilities, such as 1080p or even 4K resolution. This will ensure that captured footage is clear and detailed, making it easier to identify individuals and events.
- Camera Type: Decide between wired and wireless cameras. Wired cameras provide a reliable and stable connection but require running cables for power and data. Wireless cameras offer easier installation but may be subject to signal interference or limited range.
- Night Vision: Ensure that the outdoor cameras have infrared (IR) or low-light capabilities for capturing clear footage even in darkness. Look for cameras with a sufficient range for your specific needs.
- Weather Resistance: Outdoor cameras need to withstand various weather conditions. Look for cameras with an IP65 or higher weatherproof rating to ensure they can handle rain, snow, and extreme temperatures.
- Storage Options: Determine how you want to store the recorded footage. You can choose between local storage with a network video recorder (NVR) or cloud-based storage options. Consider the capacity and ease of access when selecting the storage method.
- Remote Access: Check if the outdoor camera surveillance system offers remote access features. This allows you to view live footage, receive alerts, and manage the system remotely from your smartphone, tablet, or computer.
- Integration with Other Security Systems: If you have an existing security system, such as an alarm or smart home hub, consider choosing outdoor cameras that can integrate with those systems. This allows for a more comprehensive and streamlined security setup.
Additionally, it is crucial to read customer reviews and research the reputation and reliability of the outdoor camera surveillance system before making a purchase. Look for brands that are known for their quality, customer support, and continuous firmware updates.
Remember that the outdoor camera surveillance system you choose should align with your specific security needs. Consider factors such as the size of your property, the level of visibility required, and any specific areas of concern. Taking the time to choose the right system ensures that you invest in a solution that effectively meets your security goals.
Planning the Camera Placement
Proper camera placement is crucial to maximize the effectiveness of your outdoor camera surveillance system. By strategically positioning the cameras, you can ensure comprehensive coverage of your property while minimizing blind spots. Here are some important considerations when planning the camera placement:
- Identify Vulnerable Areas: Start by identifying the vulnerable areas of your property that require monitoring. These may include points of entry such as doors, windows, and gates, as well as areas with high-value items or sensitive information.
- Determine Optimal Angles and Distances: Consider the ideal angles and distances for capturing the most relevant footage. Ensure that the cameras can record clear images of faces and other identifying details. Avoid positioning the cameras too high or too low, as it may result in distorted or ineffective footage.
- Consider Lighting Conditions: Take into account the lighting conditions of each area when planning camera placement. Place cameras in well-lit areas or ensure they have built-in infrared (IR) capabilities to capture footage in low-light or nighttime conditions.
- Avoid Obstructions: Remove any potential obstructions that may hinder the camera’s view. Trim trees or shrubs, relocate objects, or consider using camera mounts or brackets to overcome any obstacles that may impede the camera’s field of vision.
- Ensure Proper Coverage: Aim to achieve overlapping coverage by strategically placing cameras to ensure continuity between their fields of view. This helps fill in any potential blind spots and provides comprehensive surveillance of the property.
- Secure Camera Mounting: Ensure that the cameras are securely mounted to ensure stability and avoid tampering. Opt for sturdy materials and mounts that can withstand outdoor conditions and potential attempts at vandalism.
- Consider Privacy Concerns: Be mindful of privacy laws and ethical considerations when planning camera placement. Avoid pointing cameras directly at neighboring properties or areas where privacy may be compromised.
It is advisable to create a camera placement plan by sketching a diagram of your property. This will help visualize the areas of coverage and identify any potential gaps. Consider consulting with a professional or seeking advice from experienced users or security experts to ensure optimal camera positioning.
Remember that camera placement is a dynamic process, and it may require adjustments over time. Regularly assess the effectiveness of your camera placement and make necessary changes to optimize the surveillance coverage.
By carefully planning the camera placement, you can ensure that your outdoor camera surveillance system provides comprehensive coverage, minimizes blind spots, and effectively monitors the important areas of your property.
Installing the Cameras
Now that you have planned the camera placement, it’s time to install your outdoor surveillance cameras. Proper installation is crucial to ensure the stability, durability, and optimal functioning of the cameras. Here are the necessary steps to follow when installing your cameras:
- Prepare the Required Tools: Gather all the necessary tools and equipment for the installation process. This may include a drill, screws, screwdriver, ladder, cable management accessories (if applicable), and any other hardware recommended by the camera manufacturer.
- Mount the Cameras: Start by mounting the cameras in their designated locations. Use the appropriate mounting brackets or hardware provided with the cameras. Ensure that the mounting is secure and the cameras are positioned according to your planned placement.
- Power Supply: Determine the power supply for your cameras. If using wired cameras, run power cables from a nearby power source. For wireless cameras, ensure they are properly charged or connected to a continuous power supply.
- Run Data Cables (if applicable): If using wired cameras, run the necessary data cables from the cameras to the designated recording or monitoring device. Use cable management accessories, such as conduit or cable clips, to keep the cables organized and protected.
- Test Camera Connections: After mounting the cameras and connecting the necessary cables, test the camera connections to ensure they are properly functioning. Check for live video feeds and verify that all the cameras are capturing clear footage.
- Set up Weather Protection: Depending on the weather resistance features of your cameras, you may need to provide additional weather protection. This could include using weatherproof housing or covers to shield the cameras from rain, snow, or extreme temperatures.
- Adjust Camera Angles: Once the cameras are installed, adjust their angles and direction to ensure optimal coverage. Fine-tune and test different angles to capture the desired field of view while avoiding any obstructions.
It is essential to carefully follow the manufacturer’s instructions during the installation process. These instructions may include specific guidelines for mounting, wiring, and adjusting the cameras. It is also important to ensure that the cameras are installed at a proper height and securely fastened to minimize the risk of tampering or theft.
If you are not confident in your technical skills, it is recommended to consult a professional or seek assistance from a knowledgeable individual to ensure a proper installation. Their expertise can help you avoid common mistakes and ensure that your outdoor camera surveillance system is installed correctly.
Remember to prioritize safety during the installation process. Use caution when working at heights, secure ladders properly, and follow all safety guidelines recommended for your specific installation location.
Once the cameras are successfully installed, you can proceed to the next step of adjusting camera settings and configuring your outdoor surveillance system for optimal performance.
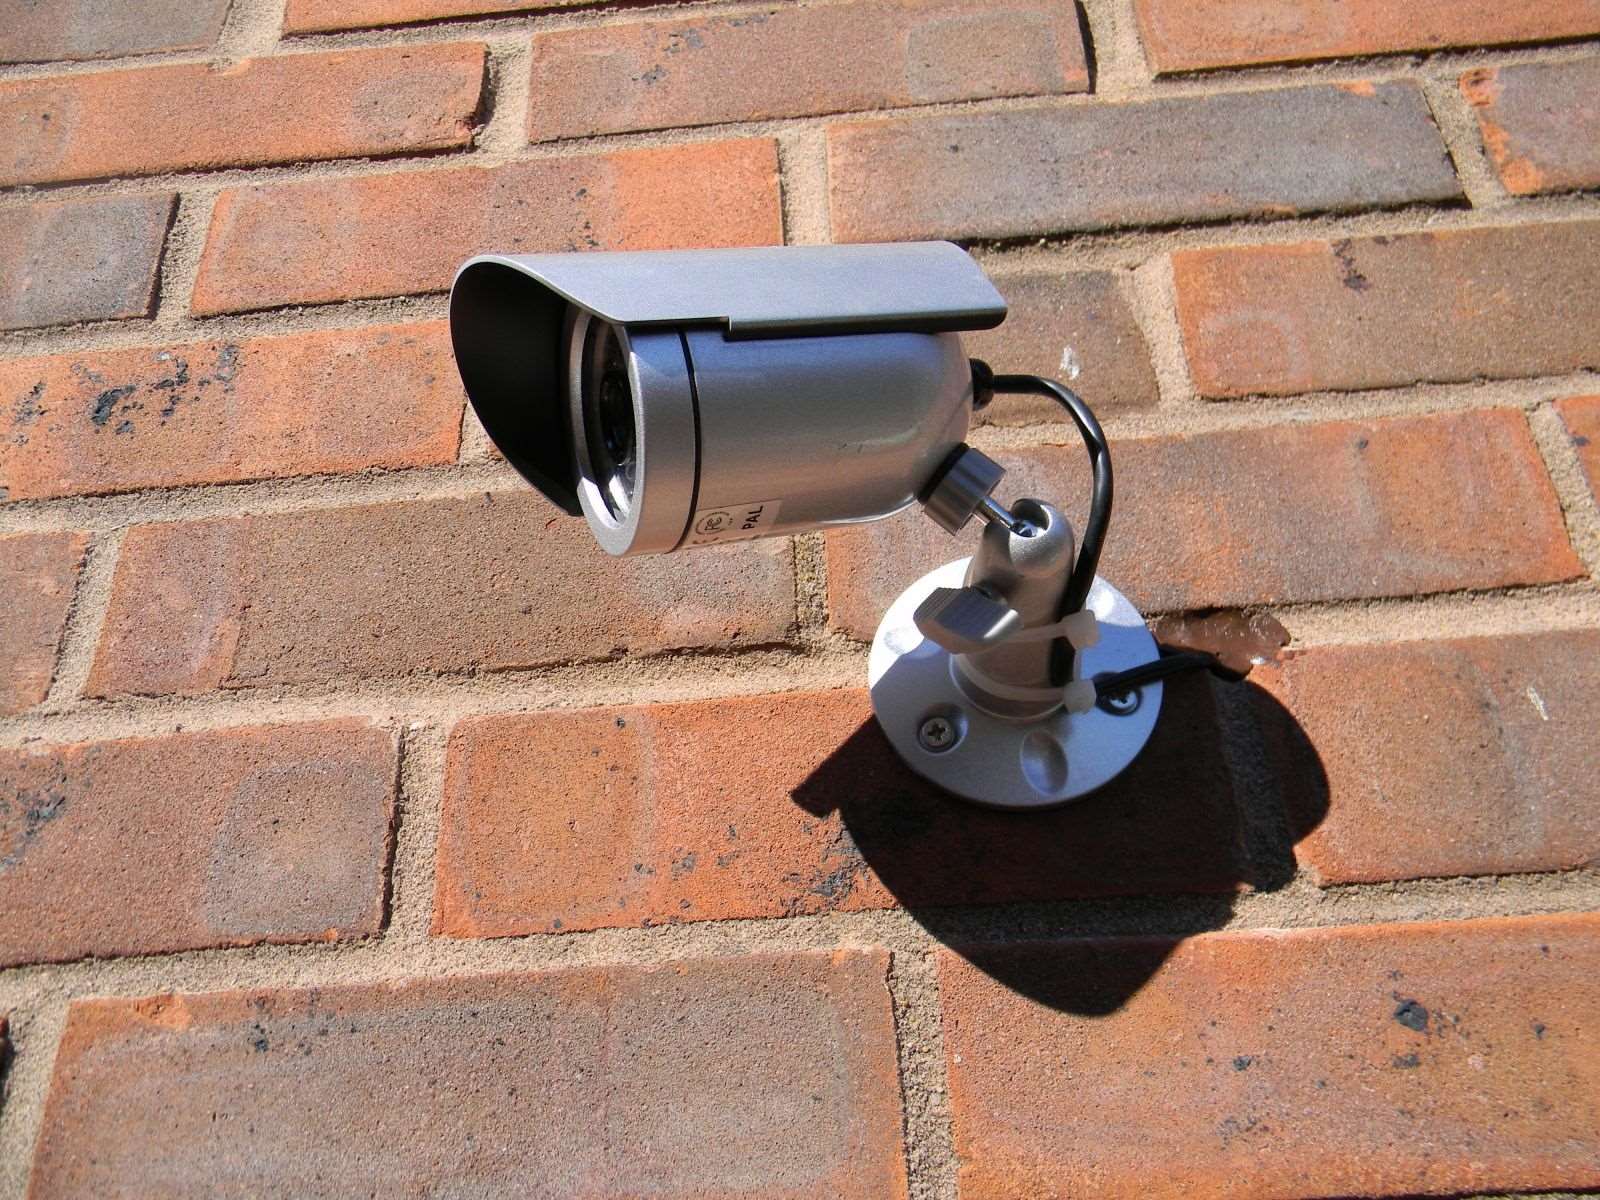
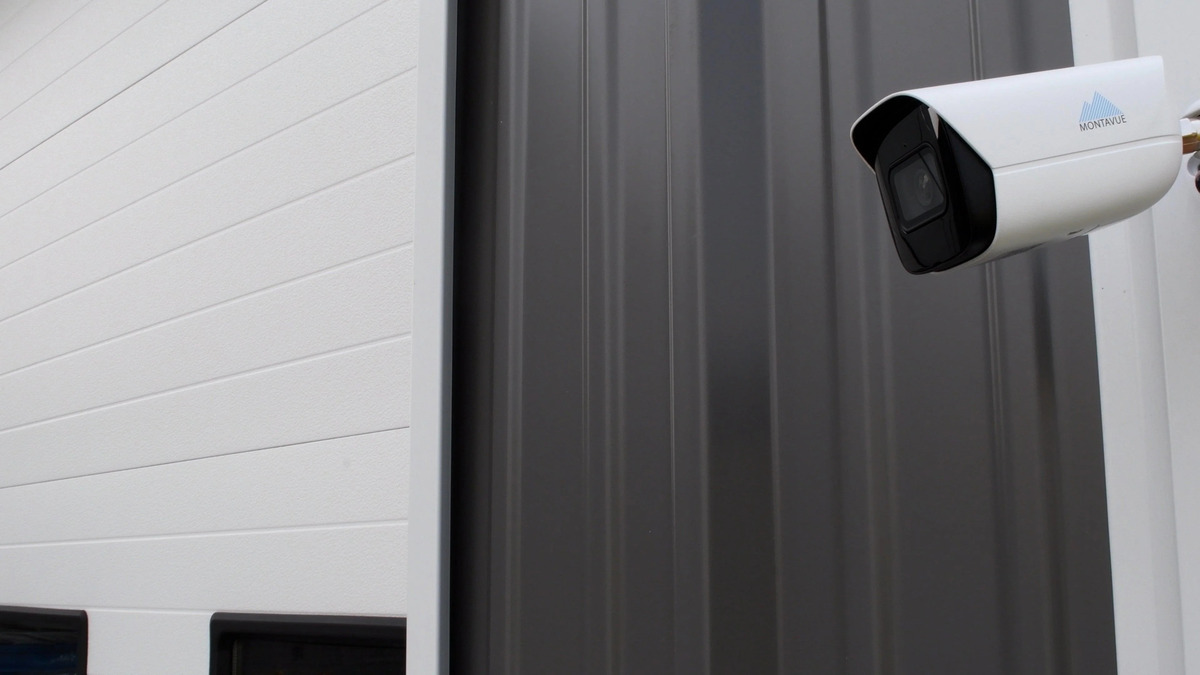
When setting up outdoor camera surveillance, make sure to place the cameras at a height where they can’t be easily tampered with, and have a clear line of sight to the areas you want to monitor.
Adjusting Camera Settings
After successfully installing your outdoor surveillance cameras, it’s time to adjust the camera settings to ensure optimal performance and functionality. Fine-tuning these settings will help you achieve the desired level of surveillance and ensure that the cameras capture the necessary footage without overwhelming you with unnecessary alerts or recordings. Here are the key settings to consider:
- Video Quality: Adjust the video quality settings of your cameras to balance image clarity and storage requirements. Higher video quality settings will result in clearer footage but may consume more storage space. Find the right balance that suits your needs.
- Motion Detection: Enable motion detection on your cameras. Adjust the sensitivity levels to minimize false alerts caused by natural movements like trees or animals. Fine-tune this setting to capture significant movements while avoiding unnecessary notifications.
- Notification Settings: Configure the notification settings to receive alerts when motion is detected. Decide whether you prefer email notifications, push notifications on your mobile device, or both. Ensure that you enable notifications for critical areas or times when surveillance is particularly important.
- Recording Settings: Determine the recording settings for your cameras. Choose whether you want continuous recording or motion-triggered recording. Consider the storage capacity of your recording device and adjust the recording settings accordingly.
- Scheduling: Set up a schedule for your cameras to determine when they should be recording or monitoring. This could be useful to limit recording during quiet hours or when your property is typically unoccupied. Scheduling can help optimize storage usage and prolong the life of your cameras.
- Privacy Masking: Use privacy masking to block out or blur specific areas of the camera’s view. This feature ensures the privacy of individuals or areas outside the scope of your surveillance needs. It is particularly useful if your cameras capture public spaces.
- Remote Access: Configure the remote access settings to enable access to your cameras from anywhere using a smartphone, tablet, or computer. Set up the necessary permissions and security measures to ensure that only authorized individuals can access the live feeds and recordings.
It is important to consult the user manual or the manufacturer’s documentation for specific guidance on adjusting camera settings. Each camera model may have its own interface or software for accessing and changing the settings. Take the time to familiarize yourself with the camera’s interface or software to make the necessary adjustments effectively.
Regularly review and monitor the camera settings to ensure they continue to meet your surveillance needs. Fine-tuning these settings will help maintain the performance of your outdoor surveillance system and ensure that it remains effective in capturing the necessary footage.
With the camera settings adjusted, you can now move on to connecting your outdoor surveillance system to a monitoring system, allowing you to monitor and manage the cameras remotely.
Read more: How To Set Up Wyze Outdoor Camera
Connecting to a Monitoring System
Connecting your outdoor camera surveillance system to a monitoring system is key to effectively monitor and manage your cameras. By connecting to a monitoring system, you can access live feeds, review recorded footage, and receive notifications on any device, from anywhere. Here’s how to connect your outdoor surveillance system to a monitoring system:
- Determine the Monitoring Method: Decide how you want to monitor your outdoor cameras. There are several options available, including a dedicated network video recorder (NVR), cloud-based storage services, or surveillance apps on your smartphone or computer.
- Set Up a Network Video Recorder (NVR): If you choose to use an NVR, connect the cameras to the NVR using the designated ports or cables. Follow the manufacturer’s instructions to set up the NVR and create a local network for accessing and managing the camera feeds.
- Configure Cloud-Based Storage: If you opt for cloud-based storage services, sign up for the chosen service and follow their instructions to connect your cameras. Typically, this involves creating an account, linking your cameras, and configuring the cloud settings on each camera.
- Install Surveillance Apps: Install surveillance apps on your smartphone or computer to monitor the camera feeds and access the recorded footage. Follow the app’s instructions for connecting your cameras and configure the necessary settings for remote access.
- Set Up User Permissions: Determine who should have access to the camera feeds and recordings. Create user accounts with specific permissions and passwords to control access to the monitoring system. This helps maintain the privacy and security of your surveillance setup.
- Test Monitoring System: After connecting your outdoor cameras to the monitoring system, test the connection to ensure that you can access the live camera feeds and review recordings. Make sure all the cameras are functioning correctly, and the feeds are accessible from your preferred devices.
It’s worth noting that some outdoor surveillance cameras offer built-in monitoring features, allowing you to directly access the camera feeds and recordings through a web interface or dedicated mobile app. In such cases, follow the camera manufacturer’s instructions to set up the monitoring capabilities.
Regularly check and update your monitoring system to ensure it remains up to date with the latest firmware or software updates provided by the camera manufacturer or the monitoring service. Keeping the system current helps ensure optimal performance, security, and compatibility with your cameras.
By connecting your outdoor camera surveillance system to a monitoring system, you gain the ability to remotely monitor and manage your cameras, enhancing the overall security and convenience of your surveillance setup.
Testing and Troubleshooting
Once you have installed and connected your outdoor camera surveillance system, it is essential to thoroughly test it to ensure everything is functioning as intended. Testing allows you to identify any potential issues early on and troubleshoot them effectively. Here are the necessary steps to test and troubleshoot your system:
- Check Live Feeds: Verify that you can access the live feeds from all the cameras through your monitoring system. Ensure that the camera angles and views align with your intended coverage. Check for any abnormalities or unusual behavior in the live feeds.
- Test Motion Detection: Trigger the motion detection feature by moving in front of the cameras. Verify that the cameras are capturing the movement and generating appropriate alerts. Adjust the motion detection sensitivity if needed to minimize false positives or missed events.
- Review Recorded Footage: Access the recorded footage from your monitoring system and review it for clarity and accuracy. Look for any skipped or overwritten recordings, and ensure that the footage is timestamped correctly. Check the playback functions and make sure you can easily navigate through the recordings.
- Test Remote Access: Verify that you can access the camera feeds and recordings remotely through your surveillance app or web portal. Test the functionality on different devices and ensure that you can view the feeds and perform necessary actions, such as adjusting settings or taking screenshots.
- Monitor Notification System: Ensure that you are receiving notifications for motion detection events or other configured alerts. Check the notification settings and adjust them if necessary to avoid being overwhelmed with unnecessary alerts or missing critical notifications.
- Inspect Camera Mounting and Connections: Visually inspect the camera mountings to ensure they are still secure. Check the connections of the power and data cables (if applicable) to ensure they are properly connected and not loose or damaged.
- Troubleshoot Issues: If you encounter any issues during testing, troubleshoot them systematically. Consult the user manual or contact the camera manufacturer’s support for guidance. Common troubleshooting steps include resetting cameras, updating firmware, adjusting network settings, or replacing faulty equipment.
Regular maintenance and monitoring of your outdoor camera surveillance system are essential to ensure its continued functionality and effectiveness. Schedule periodic checks of the camera feeds, review storage capacity, and perform necessary software updates to keep the system up to date.
Remember to respect privacy laws and guidelines when using outdoor surveillance cameras. Use them responsibly and ethically, taking into consideration the privacy of individuals and neighboring properties.
By thoroughly testing and troubleshooting your outdoor camera surveillance system, you can have confidence in its reliability and performance, providing you with the security and peace of mind you desire.
Conclusion
Congratulations on setting up your outdoor camera surveillance system! By following the steps outlined in this article, you have taken significant steps towards securing your property and enhancing your peace of mind. A properly installed and configured outdoor camera surveillance system can provide valuable security features, monitoring capabilities, and deterrence against potential threats.
Throughout the process, you learned how to choose the right outdoor camera surveillance system based on your specific needs and requirements. You understood the importance of strategic camera placement, considering factors such as vulnerability, angles, lighting, and obstructions. You also gained insights into the installation process, ensuring stability and durability of the cameras.
Adjusting the camera settings allowed you to optimize their performance, ensuring clear video quality, effective motion detection, and relevant notifications. Connecting your outdoor cameras to a monitoring system enabled remote access and management, giving you the flexibility to monitor your property from anywhere.
Testing and troubleshooting your system verified its functionality and allowed you to address any potential issues early on. By regularly monitoring, maintaining, and updating your system, you can ensure its continued reliability and effectiveness.
Remember, privacy and ethical considerations play a crucial role in the use of outdoor camera surveillance systems. Always respect the privacy of others and comply with the legal guidelines in your area. Use your surveillance system responsibly and ethically to protect your property and the well-being of those involved.
By implementing an outdoor camera surveillance system, you have taken a proactive approach to enhance the security and safety of your home or business. Enjoy the peace of mind that comes with knowing that your property is being monitored and protected. Regularly assess and update your system as needed to keep up with advancements in technology and ensure its ongoing effectiveness.
Now, with your outdoor camera surveillance system in place, you can relax and have confidence in the security measures you have taken. You have empowered yourself with surveillance capabilities to deter potential threats and effectively monitor your property. Stay vigilant, and take advantage of the benefits that a well-designed and properly maintained outdoor camera surveillance system can bring.
Frequently Asked Questions about How To Set Up Outdoor Camera Surveillance
Was this page helpful?
At Storables.com, we guarantee accurate and reliable information. Our content, validated by Expert Board Contributors, is crafted following stringent Editorial Policies. We're committed to providing you with well-researched, expert-backed insights for all your informational needs.