Home>Furniture>Outdoor Furniture>How To Make A Mosaic Patio Table Top
Outdoor Furniture
How To Make A Mosaic Patio Table Top
Modified: April 29, 2024
Learn how to create a stunning mosaic patio table top for your outdoor furniture with our step-by-step guide. Enhance your outdoor space with this DIY project!
(Many of the links in this article redirect to a specific reviewed product. Your purchase of these products through affiliate links helps to generate commission for Storables.com, at no extra cost. Learn more)
Introduction
Welcome to the world of outdoor furniture! Whether you have a spacious backyard, a cozy patio, or a charming balcony, having the right furniture can transform your outdoor space into a stylish and comfortable retreat. One versatile and visually appealing option for outdoor furniture is a mosaic patio table top.
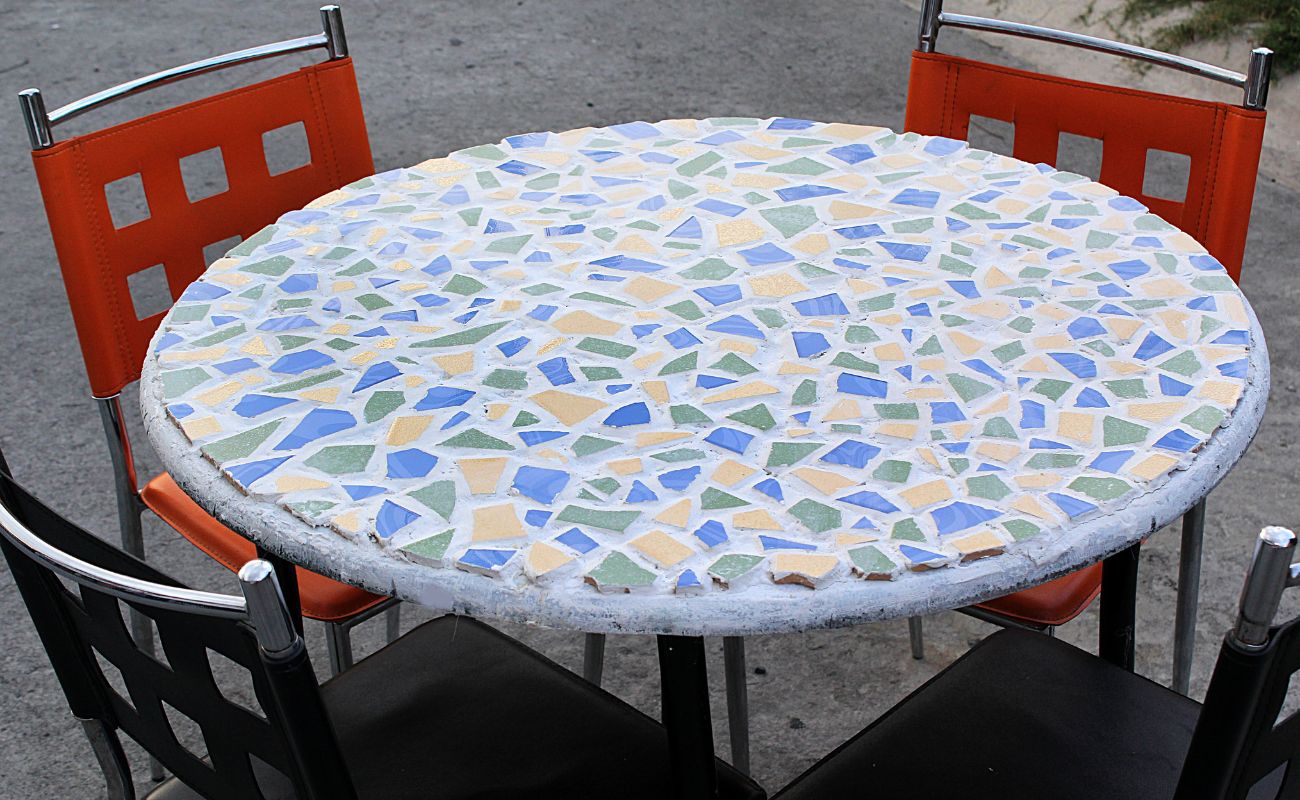
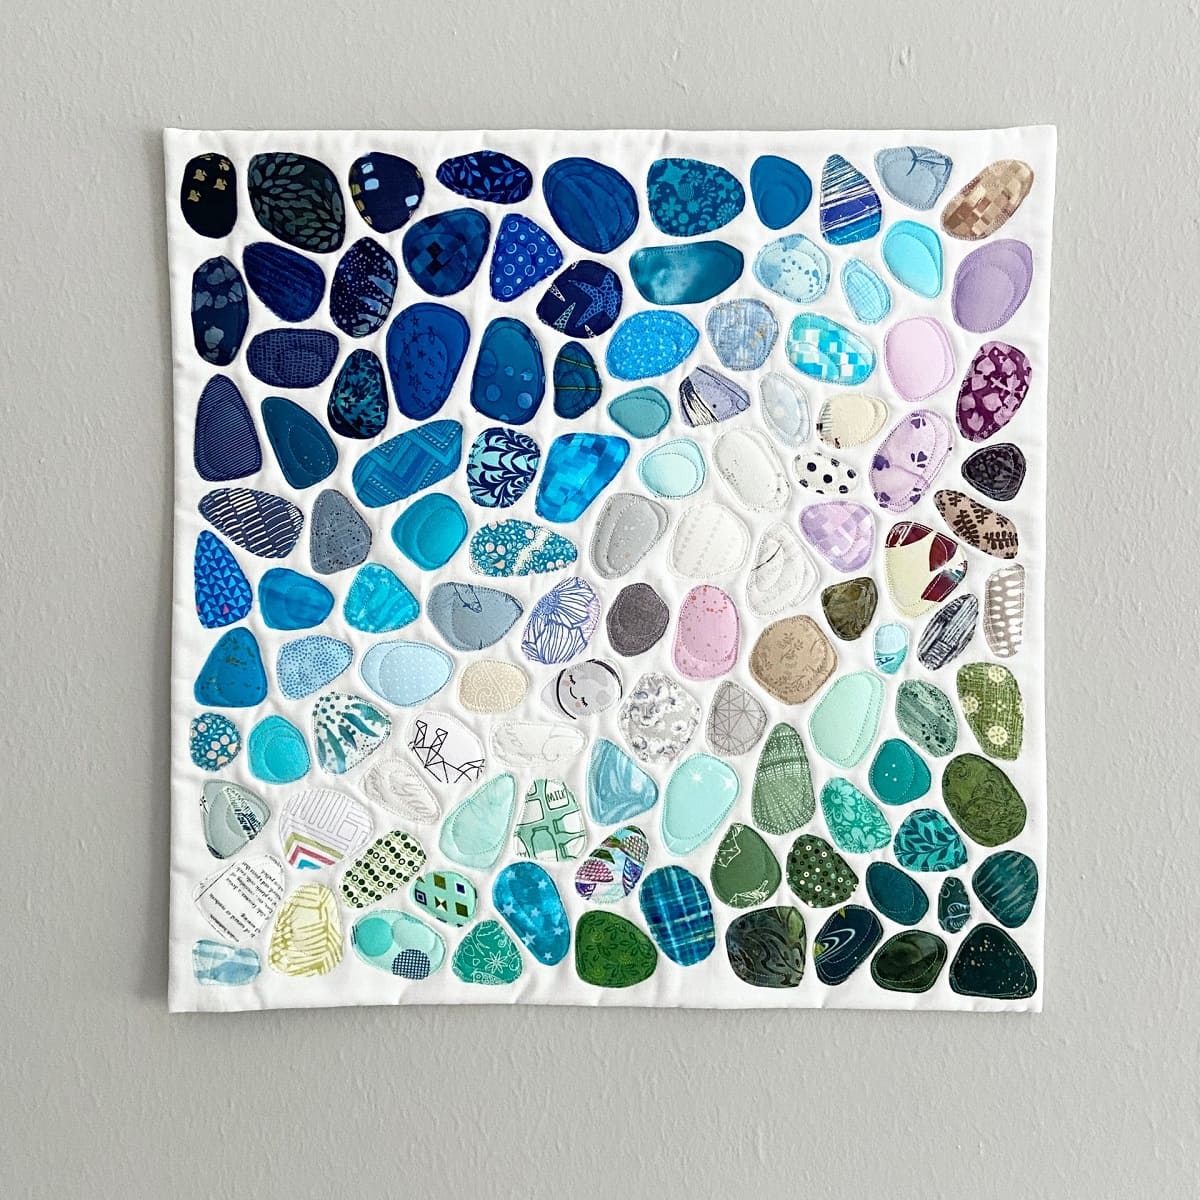
A mosaic patio table top adds a touch of artistry and personality to your outdoor space. With vibrant colors, intricate designs, and a durable construction, it can become the centerpiece of your patio or garden. Creating your own mosaic patio table top allows you to customize the design and choose materials that match your style and preferences.
In this article, we will walk you through the step-by-step process of making a mosaic patio table top. We will cover everything from choosing the base table to cleaning and finishing the final product. So, put on your creative hat, roll up your sleeves, and let’s get started on this exciting DIY project!
Key Takeaways:
- Creating a mosaic patio table top is a fun and rewarding DIY project that allows you to add a personalized and visually stunning touch to your outdoor space.
- From choosing the right base table to designing the mosaic pattern and applying the tiles, each step in the process plays a crucial role in bringing your creative vision to life.
Read more: How To Make An Outdoor Mosaic Table Top
Materials Needed
Before diving into the project, it’s important to gather all the necessary materials. Here’s a list of items you’ll need to create your mosaic patio table top:
- A base table: This can be an old or new table with a flat and sturdy surface. Choose a size and shape that suits your space and preferences.
- Mosaic tiles: These can be glass, ceramic, or stone tiles. Opt for tiles that are weather-resistant and suitable for outdoor use. Choose a variety of colors and sizes to create an interesting mosaic pattern.
- Tile adhesive: Look for a waterproof and outdoor-friendly adhesive that will securely bond the tiles to the base table.
- Grout: Select a grout that complements your mosaic tiles and provides a strong and durable finish.
- Grout sealer: This will protect the grout from staining and help prolong the life of your mosaic patio table top.
- Tile nippers or glass cutter: These tools will be necessary for cutting and shaping tiles to fit your desired mosaic pattern.
- Safety goggles and gloves: It’s important to protect your eyes and hands while handling the tiles and working with adhesive and grout.
- Sponges and rags: These are essential for cleaning excess adhesive and grout during the installation process.
- Paintbrush: You’ll need a paintbrush to apply grout sealer to the finished table top.
- Waterproof table cover or patio umbrella: To protect your mosaic patio table top from rain and harsh sunlight, consider investing in a waterproof table cover or a patio umbrella.
Having all these materials on hand will ensure a smooth and efficient process as you create your stunning mosaic patio table top. Now that you have everything you need, let’s move on to the next step: choosing the perfect base table for your project!
Step 1: Choosing the Base Table
The base table is the foundation of your mosaic patio table top, so it’s essential to choose one that is suitable for outdoor use and fits your desired size and style. Here are a few factors to consider when selecting a base table:
- Size and shape: Consider the available space in your outdoor area. Measure the area where the table will be placed and choose a size and shape that fits well. Rectangular, round, or square tables are common options.
- Material: Opt for a base table made from materials that can withstand the outdoor elements. Common options include metal, wood (such as teak or cedar), or durable synthetic materials like resin or polywood.
- Sturdiness: Ensure that the base table is sturdy and has a flat surface. This will provide a stable foundation for the mosaic tiles and prevent any wobbling.
- Style: Consider the overall style and theme of your outdoor space. Choose a base table that complements your existing furniture and décor. Whether you prefer a modern, rustic, or traditional look, there are plenty of options available.
Once you have determined the size, material, and style of your ideal base table, you can either repurpose an old table or purchase a new one. Thrift stores, garage sales, and online marketplaces are great sources for finding affordable, second-hand options. If you decide to buy a new table, consider checking out outdoor furniture retailers or local home improvement stores.
Remember, the base table will serve as the canvas for your mosaic creation, so choose one that you love and that suits your outdoor space. With the perfect base table in hand, it’s time to move on to the next step: designing the mosaic pattern!
Step 2: Designing the Mosaic Pattern
Designing the mosaic pattern is the creative and fun part of the process. This is where you can let your imagination run wild and create a design that reflects your personal style and preferences. Here are some tips to guide you through the design phase:
- Choose a theme: Consider what theme or motif you want to incorporate into your mosaic patio table top. It could be nature-inspired, geometric, floral, or abstract. Look for inspiration in magazines, books, or even online resources.
- Decide on a color palette: Select a color palette that complements your outdoor space and reflects the mood you want to create. You can go for a monochromatic scheme, a vibrant mix of colors, or a harmonious combination of hues.
- Sketch the design: Using graph paper or a sketchbook, draw a scaled-down version of your base table and start sketching your mosaic pattern. Play around with different shapes, arrangements, and tile colors to create a visually appealing design.
- Consider focal points: Determine if you want to highlight specific areas of the table top with a focal point or center design. This could be a larger tile or a unique pattern that draws attention.
- Think about the placement of tiles: Plan where each tile will go and how they will fit together. Take into account the size and shape of your tiles and consider using different textures or finishes to add visual interest.
Remember, the design process is all about experimenting and playing with different possibilities. Don’t be afraid to try out different ideas and make adjustments as you go. Once you are satisfied with your mosaic pattern, it’s time to move on to the next step: gathering the tiles!
Step 3: Gathering the Tiles
Now that you have your mosaic pattern designed, it’s time to gather the tiles that will bring your vision to life. Here’s what you need to do:
- Measure and calculate: Measure the space of each section of your mosaic pattern to determine how many tiles you will need. This will help you estimate the quantity and size of tiles required.
- Choose the right tiles: Select tiles that are suitable for outdoor use and can withstand exposure to the elements. Opt for materials like ceramic, glass, or natural stone that are durable and weather-resistant.
- Consider different shapes and sizes: Experiment with various tile shapes (such as squares, rectangles, circles, or hexagons) to add visual interest to your design. Mixing different sizes can also create a dynamic mosaic pattern.
- Explore tile colors and finishes: Select colors that complement your outdoor space or align with the desired aesthetic. Consider incorporating different finishes, such as glossy, matte, or textured tiles, to add depth to your mosaic.
- Shop for tiles: Visit local tile stores or search online for suppliers that offer a wide variety of mosaic tiles. Take your design and measurements with you to ensure you make the right choices for your project.
- Order extra tiles: It’s always a good idea to order a few extra tiles to account for any breakages or mistakes during the installation process.
Gathering the right tiles is crucial for the success of your mosaic patio table top. Take your time to find high-quality tiles that align with your design vision. With the tiles in hand, you are now ready to move on to the next step: preparing the base table!
Read more: How To Make Outdoor Mosaic
Step 4: Preparing the Base Table
Before you start applying the mosaic tiles to the base table, it’s important to properly prepare the surface. Follow these steps to ensure a clean and smooth foundation for your mosaic patio table top:
- Clean the table: Remove any dirt, dust, or debris from the base table using a damp cloth or sponge. Make sure the surface is completely dry before proceeding.
- Sand the surface (if needed): If the base table has a rough or uneven surface, lightly sand it with sandpaper. This will create a smoother and more adhesive-friendly surface for the mosaic tiles.
- Protect the edges (optional): If you want to keep the edges of your base table exposed, use painter’s tape or masking tape to cover them. This will prevent them from getting accidentally covered with adhesive or grout.
- Apply a primer (optional): Depending on the material of your base table, you may need to apply a primer to enhance the adhesion of the tiles. Check the instructions of the primer and follow them accordingly.
By properly preparing the base table, you are ensuring that the mosaic tiles will adhere securely and create a long-lasting and visually appealing patio table top. Once the table is prepped, it’s time to move on to the exciting part: applying the adhesive!
When making a mosaic patio table top, make sure to use weather-resistant materials like ceramic tiles or glass pieces. Seal the finished mosaic with a waterproof sealant to protect it from the elements.
Step 5: Applying Adhesive
Now that the base table is prepared, it’s time to start adhering the mosaic tiles. Follow these steps to apply the adhesive:
- Read the instructions: Carefully read and follow the instructions provided by the manufacturer of the tile adhesive. Different adhesives may have specific guidelines for application, drying time, and compatibility.
- Work in small sections: It’s best to work in small sections rather than applying adhesive to the entire table at once. This allows you to focus on one area at a time and prevents the adhesive from drying out before you can place the tiles.
- Apply the adhesive: Using a trowel or a putty knife, spread a thin layer of adhesive onto the surface of the base table in the section you are working on. Make sure to spread it evenly and cover the entire area where the tiles will be placed.
- Make grooves (optional): If you are working with larger tiles or uneven surfaces, you can create grooves or ridges in the adhesive using the notched side of the trowel. This helps provide better grip and ensures proper adhesion of the tiles.
- Start placing the tiles: Begin placing the mosaic tiles onto the adhesive, following your designed pattern. Press each tile firmly into the adhesive to ensure a strong bond. Use tile spacers if needed to maintain consistent spacing between the tiles.
- Continue in sections: Work your way across the table, applying adhesive and placing tiles in small sections. Take your time to align the tiles and adjust their position as needed.
- Trim tiles (if necessary): Use tile nippers or a glass cutter to trim tiles to fit along the edges or around any obstacles like corners or curves. Be cautious and use safety goggles while cutting tiles.
Ensure that you are working in a well-ventilated area, as some adhesives may have strong odors. Take breaks as needed and allow the adhesive to dry according to the manufacturer’s instructions before moving on to the next step.
With the adhesive applied and the mosaic tiles in place, your base table is transformed into a work of art. The next step is to move on to placing the tiles and creating your stunning mosaic design.
Step 6: Placing the Tiles
With the adhesive applied to the base table, it’s time to start placing the mosaic tiles and bringing your design to life. Here’s how you can proceed with this step:
- Refer to your design: Use your sketched design or reference image to guide you in placing the tiles. Follow the pattern, color scheme, and placement you have planned.
- Press the tiles firmly: As you place each tile onto the adhesive, press it firmly into place. Ensure that the tile is level and aligned with neighboring tiles and the overall design.
- Check for consistency: Keep an eye on the spacing between tiles. Use tile spacers to maintain consistent gaps and ensure the tiles are evenly positioned.
- Make adjustments when necessary: If you encounter any unevenness or gaps, gently adjust the tiles to achieve a smooth and uniform surface. Rearrange as needed to achieve the desired look.
- Take breaks: As you work on placing the tiles, take breaks to stand back and assess your progress. This allows you to evaluate the overall design and make any necessary adjustments or corrections.
- Work in sections: Just like with applying the adhesive, it’s best to work in small sections. Complete one section at a time before moving on to the next, ensuring each area is properly aligned and adhered.
- Continue until the entire table is covered: Repeat the process of placing tiles, pressing them firmly into the adhesive, and adjusting as needed until the entire base table is covered with your mosaic design.
Remember to take your time and enjoy the creative process. Mosaic artwork is about attention to detail and precision, so ensuring each tile is properly placed will create a visually stunning end result. Once the tiles are all in position, it’s time to move on to the next step: grouting the tiles.
Step 7: Grouting the Tiles
Grouting is a crucial step in the mosaic patio table top process as it fills in the gaps between the tiles and provides a strong and durable finish. Follow these steps to grout your mosaic table:
- Choose the right grout: Select a grout color that complements your mosaic design and enhance its overall aesthetic. Ensure that the grout is suitable for outdoor use and matches the durability requirements of your project.
- Mix the grout: Follow the instructions provided by the manufacturer to mix the grout to the correct consistency. Use a clean container and mix it thoroughly until it reaches a smooth and lump-free texture.
- Apply the grout: Spread the grout over the mosaic tiles using a grout float or a putty knife. Push the grout into the gaps between the tiles, ensuring it is fully covering the spaces.
- Work in small sections: Similar to the previous steps, grout the table in small sections rather than applying it to the entire surface at once. This allows you to focus on one area at a time and ensures the grout doesn’t dry out before you can clean the excess.
- Remove excess grout: After applying the grout, use a damp sponge or cloth to gently remove the excess grout from the surface of the tiles. Rinse the sponge or cloth frequently to prevent spreading excess grout.
- Smooth and shape the grout lines: Use a grout scraper or a rounded stick to smooth and shape the grout lines. This helps ensure an even and professional finish.
- Allow the grout to cure: Follow the instructions provided by the grout manufacturer for the recommended curing time. Avoid placing any heavy objects or applying pressure on the tabletop during this time.
Grouting can be messy, so take extra care to protect your working area and wear gloves to protect your hands. Once the grout has dried and cured, it’s time to move on to the final step: cleaning and finishing the table.
Read more: How To Make Mosaic Backsplash
Step 8: Cleaning and Finishing the Table
After the grout has cured, it’s time to clean the mosaic patio table top and give it a finished look. Follow these final steps to complete your project:
- Remove dried grout residue: Use a clean, damp sponge or cloth to gently wipe away any remaining grout residue on the surface of the tiles. Rinse the sponge or cloth frequently to ensure a thorough cleaning.
- Apply grout sealer: Once the table is clean and dry, apply a grout sealer according to the instructions provided by the manufacturer. The grout sealer will protect the grout from staining and prolong its lifespan.
- Protect the mosaic: To ensure the longevity of your mosaic patio table top, consider covering it with a waterproof table cover or placing it in a sheltered location when not in use. This will protect it from harsh weather conditions.
- Enjoy and showcase your creation: Your mosaic patio table top is now complete! Place it in your outdoor space and enjoy the beauty and artistry you have created. Invite friends and family over to show off your unique masterpiece and enjoy some quality time together.
Remember to regularly clean and maintain your mosaic table to keep it looking its best. Avoid using harsh chemicals or abrasive cleaning tools that may damage the tiles or the grout. Instead, opt for mild soap, water, and a soft cloth for cleaning.
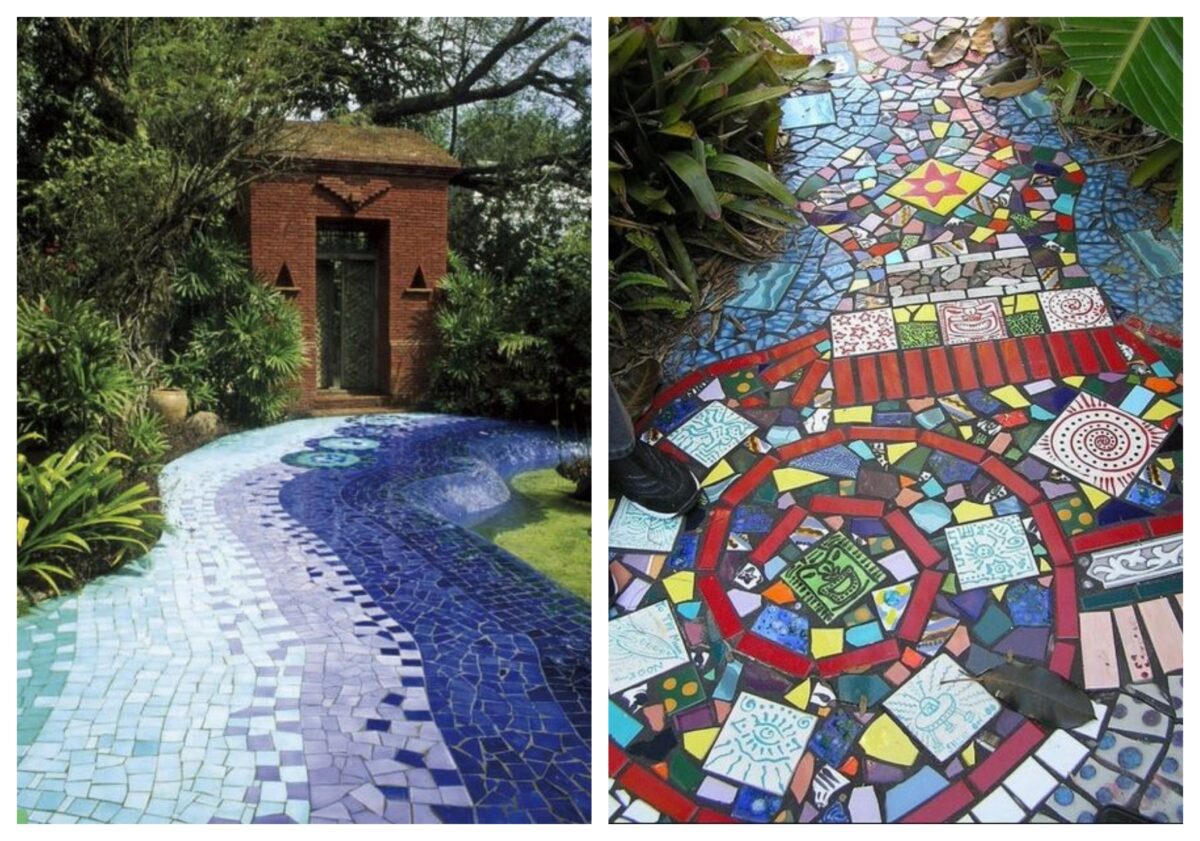
Creating a mosaic patio table top is a rewarding and creative DIY project that allows you to add a personalized and visually stunning touch to your outdoor space. As you hone your skills and gain confidence, you can even explore other mosaic projects, such as wall decorations or stepping stones. Have fun with your newfound mosaic skills and let your creativity shine!
Conclusion
Creating a mosaic patio table top is a wonderful way to add a touch of artistry and personalization to your outdoor space. By following the step-by-step process outlined in this article, you can transform a plain base table into a stunning mosaic masterpiece that becomes the focal point of your patio or garden.
From choosing the right base table and designing the mosaic pattern to gathering the perfect tiles and applying adhesive, each step plays a crucial role in bringing your creative vision to life. With careful planning and attention to detail, you can create a mosaic design that reflects your individual style and complements your outdoor aesthetic.
Throughout the process, it’s important to take your time, experiment with different ideas, and enjoy the artistic journey. Remember that the beauty of mosaic art lies in its unique and intricate patterns, so embrace the creative freedom to create your own design.
Once your mosaic patio table top is complete and the grout has dried, take the time to clean and protect your masterpiece. Apply a grout sealer to enhance its durability and keep it looking fresh for years to come.
Now, it’s time to enjoy the fruits of your labor. Place your mosaic table in your outdoor space, invite friends and family over, and relish in the admiration of your unique creation. It will surely spark conversations and create cherished memories.
As you embark on this creative DIY project, remember that the possibilities are endless. Explore different tile materials, shapes, colors, and patterns to create a mosaic table that truly represents your personal style and captures the essence of your outdoor oasis.
So, grab your materials, put on your creative hat, and let your inner artist shine as you embark on the wonderful journey of creating a mosaic patio table top. Your outdoor space will be transformed into a vibrant and inviting haven that reflects your unique taste and adds a touch of artistry to your everyday life.
Frequently Asked Questions about How To Make A Mosaic Patio Table Top
Was this page helpful?
At Storables.com, we guarantee accurate and reliable information. Our content, validated by Expert Board Contributors, is crafted following stringent Editorial Policies. We're committed to providing you with well-researched, expert-backed insights for all your informational needs.


0 thoughts on “How To Make A Mosaic Patio Table Top”