Articles
How To Change An LED Ceiling Light
Modified: October 20, 2024
Learn how to change an LED ceiling light with step-by-step instructions in this informative article. Discover tips and tricks for a seamless installation process.
(Many of the links in this article redirect to a specific reviewed product. Your purchase of these products through affiliate links helps to generate commission for Storables.com, at no extra cost. Learn more)
Introduction
LED ceiling lights have become increasingly popular in modern homes, offering energy efficiency, longevity, and stylish illumination. Whether you’re looking to upgrade your current lighting fixture or replace a faulty one, learning how to change an LED ceiling light is a valuable DIY skill to have.
In this comprehensive guide, we will walk you through the step-by-step process of changing an LED ceiling light. From safety precautions to selecting the right tools and materials, we’ll cover everything you need to know to tackle this project successfully.
Before getting started, it’s essential to note that working with electrical fixtures can be dangerous if not approached with caution. If you are not confident in your abilities, it’s always best to consult an electrician. However, if you’re up for the challenge and prioritize safety, let’s dive into the steps involved in changing an LED ceiling light.
It’s important to mention that each lighting fixture may have specific installation instructions provided by the manufacturer. It’s always recommended to consult the user manual or installation guide that accompanies your specific LED ceiling light to ensure proper installation and safety compliance.
Now that we have covered the basics, let’s move on to the first step: safety precautions.
Key Takeaways:
- Safety is paramount when changing an LED ceiling light. Prioritize turning off the power, wearing protective gear, and following manufacturer instructions to ensure a secure and successful installation.
- Gather the necessary tools and materials before starting. Having everything prepared will make the process smoother and more efficient, saving time and preventing interruptions.
Read more: How To Change Light Bulb In The Ceiling
Step 1: Safety Precautions
Before starting any electrical project, it’s crucial to prioritize safety. Here are some essential safety precautions to follow when changing an LED ceiling light:
- Turn off the power: Begin by turning off the power to the lighting circuit at the main electrical panel. Locate the correct circuit breaker and switch it off to ensure that no power is flowing to the ceiling light fixture. Use a voltage tester to verify that the power is indeed off before starting any work. Safety should always be your top priority.
- Wear protective gear: It’s recommended to wear safety gloves and safety goggles to protect yourself from any potential electric shocks and debris that may occur during the installation process. These accessories will safeguard your hands and eyes from potential harm and allow you to work confidently.
- Use a stable ladder or scaffolding: Ensure you have a sturdy, stable platform to reach the ceiling light fixture. Use a ladder or scaffolding that is appropriate for the height of your ceiling. Avoid standing on chairs or other unstable objects, as this can lead to accidents or injuries.
- Work in a well-lit area: Adequate lighting is essential for visibility during the installation process. Make sure the work area is well-lit to avoid mistakes and accidental damage.
- Disconnect the power source: In addition to turning off the power at the main electrical panel, double-check that the light switch is in the off position. This provides an extra layer of safety by ensuring that no one accidentally turns on the power while you are working on the installation.
- Avoid contact with live wires: Throughout the process, be cautious of live wires. Never touch or handle wires without proper knowledge and precautions. If you are unsure about any wiring, consult a qualified electrician.
- Follow manufacturer instructions: Different LED ceiling lights may have specific instructions and safety guidelines provided by the manufacturer. Read and follow these instructions carefully to ensure proper installation and safety compliance.
By following these safety precautions, you can minimize the risks associated with working on electrical fixtures and create a secure environment for changing your LED ceiling light.
Now that you have taken the necessary safety measures, let’s move on to Step 2: Gathering the necessary tools and materials.
Step 2: Gathering the necessary tools and materials
Before you start changing an LED ceiling light, it’s important to gather all the tools and materials you’ll need. Having everything prepared ahead of time will make the installation process smoother and more efficient. Here’s a list of the essential tools and materials you’ll need:
Tools:
- Screwdriver set: You’ll need a set of screwdrivers, both flathead and Phillips, to remove screws and disconnect the existing light fixture.
- Wire cutters/strippers: These tools are necessary for cutting and stripping wires during the installation process.
- Voltage tester: A voltage tester will help you ensure that the power is off before proceeding with any electrical work.
- Adjustable wrench: This tool may come in handy for securing the mounting bracket or any other additional hardware.
- Step ladder or scaffolding: Depending on the height of your ceiling, you’ll need a stable platform to reach the light fixture.
Materials:
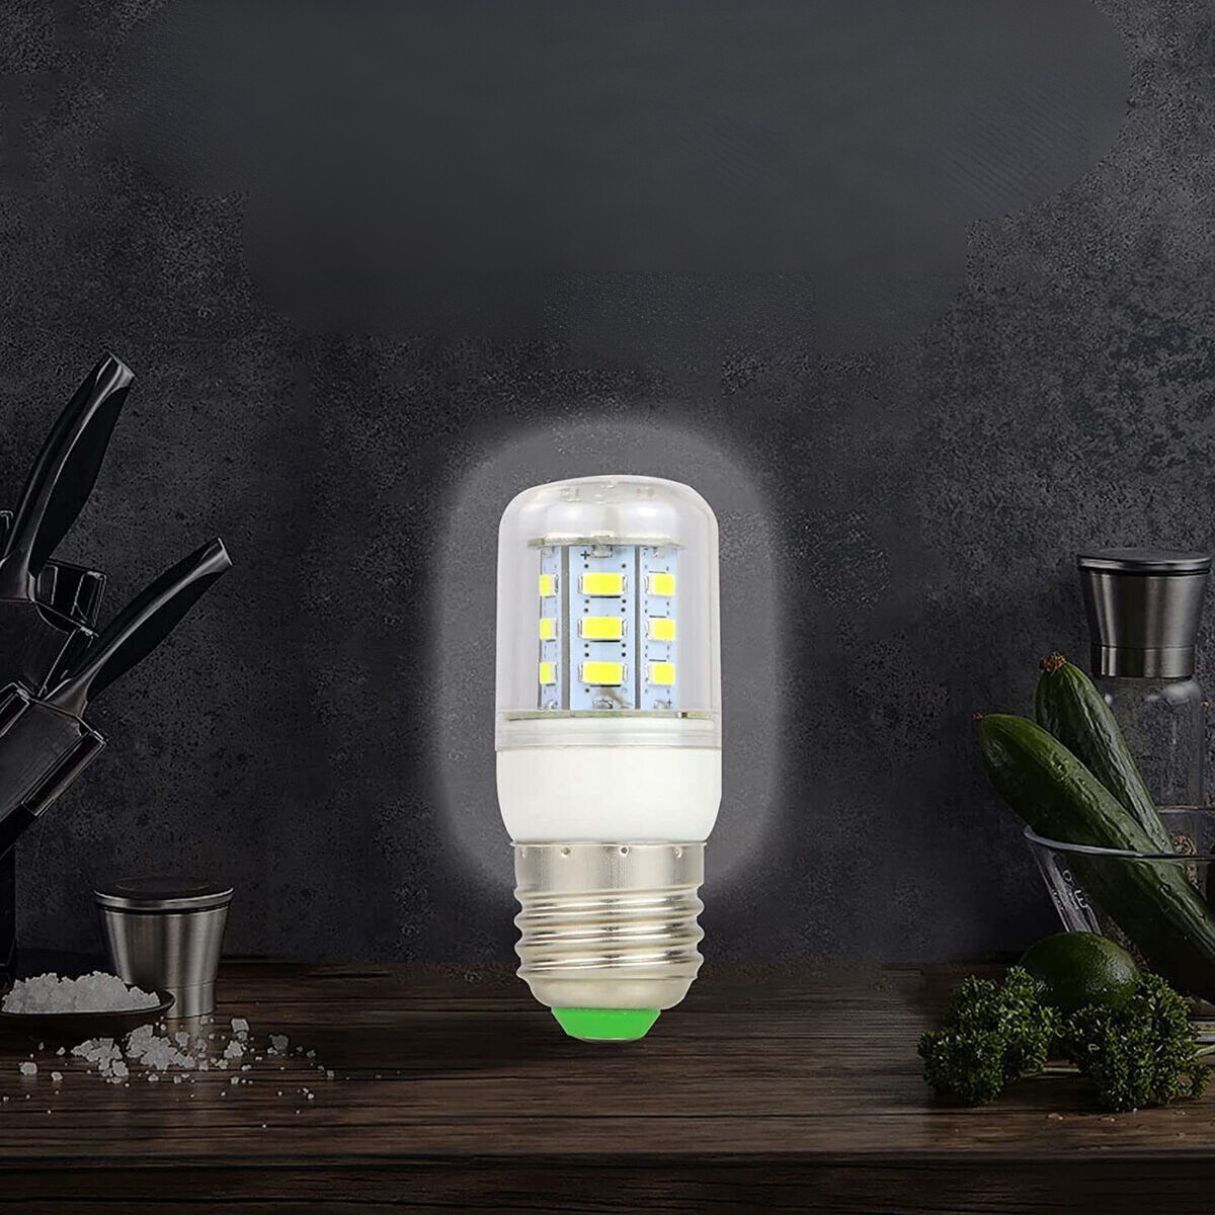
- New LED ceiling light: Choose an LED light fixture that suits your style and requirements. Consider factors like size, design, and desired brightness level.
- Wire connectors: These connectors are used to secure and join the electrical wires in a safe and reliable manner.
- Electrical tape: Electrical tape helps insulate and secure wire connections.
- Mounting screws: Depending on the new LED light fixture, you may need additional screws to secure it to the ceiling.
Ensure that you have all the necessary tools and materials organized and readily available before beginning the installation. This will save you time and prevent any delays or interruptions during the process.
Now that you’re well-prepared with the required tools and materials, let’s move on to Step 3: Turning off the power.
Read more: How To Change A Light Bulb
Step 3: Turning off the power
Before you start working on changing an LED ceiling light, it’s crucial to turn off the power to the lighting circuit. This step is essential to ensure your safety and prevent any potential accidents or electrical shocks.
Follow these steps to turn off the power:
- Locate the main electrical panel in your home.
- Open the panel door to access the circuit breakers.
- Identify the breaker that controls the lighting circuit where the LED ceiling light is connected.
- Switch off the corresponding circuit breaker by pushing it to the “off” position.
- Use a voltage tester to check if the power is off. Gently touch the tester’s leads to the wires inside the light switch or the light fixture itself to confirm the absence of voltage.
- If the voltage tester indicates that there is still electrical current running to the circuit, double-check that you’ve switched off the correct breaker. Repeat the process until you can confirm that there is no power flowing.
Remember, safety should always be your top priority when working with electricity. Double-checking and confirming that the power is off will help protect you from potential harm.
Once you have ensured that the power is turned off, it’s time to move on to Step 4: Removing the existing LED ceiling light.
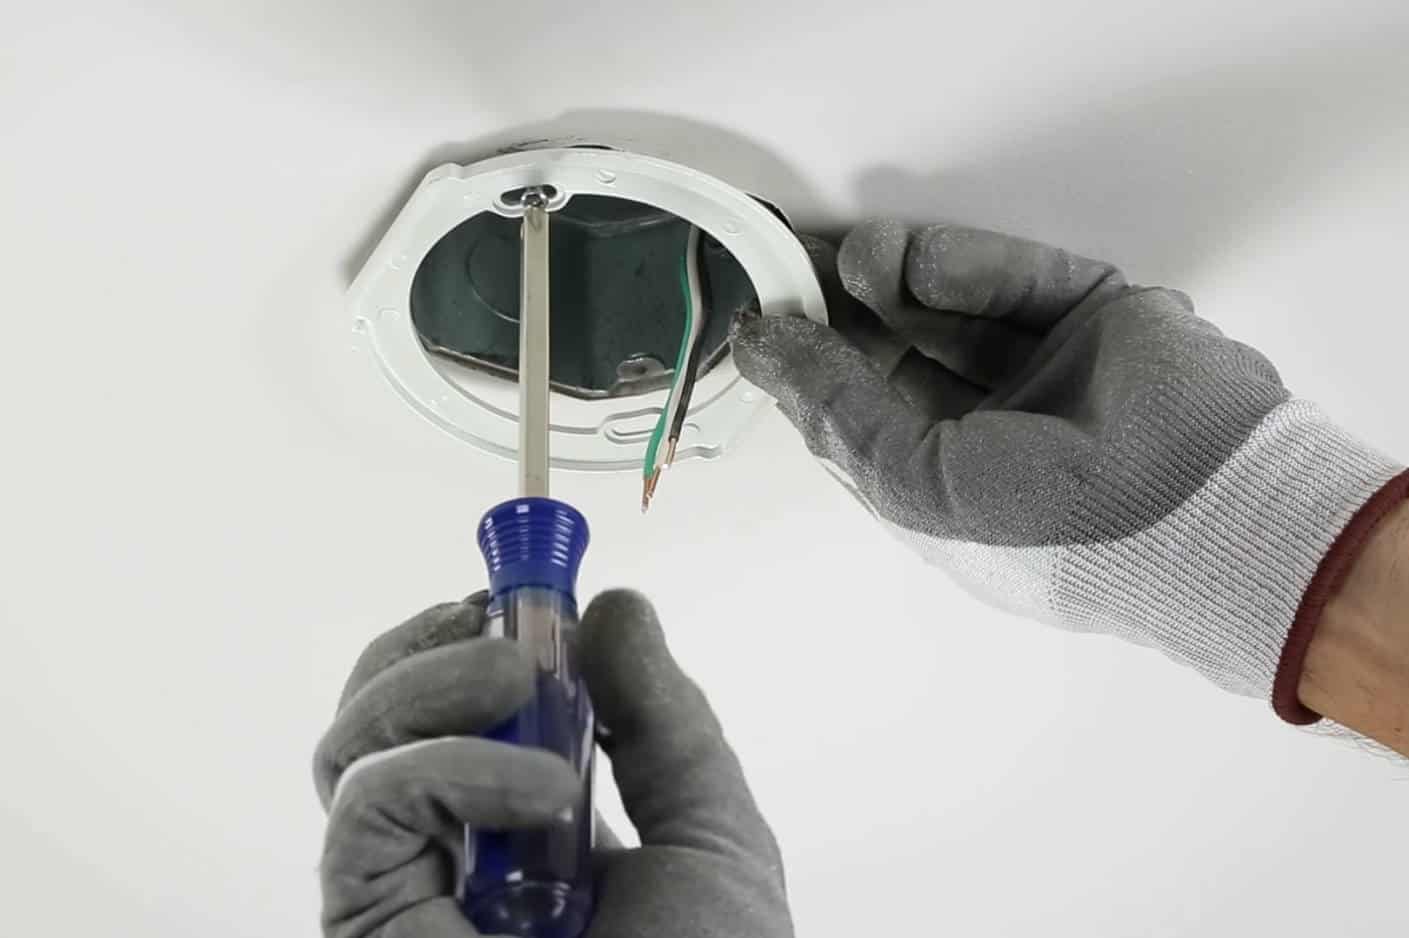
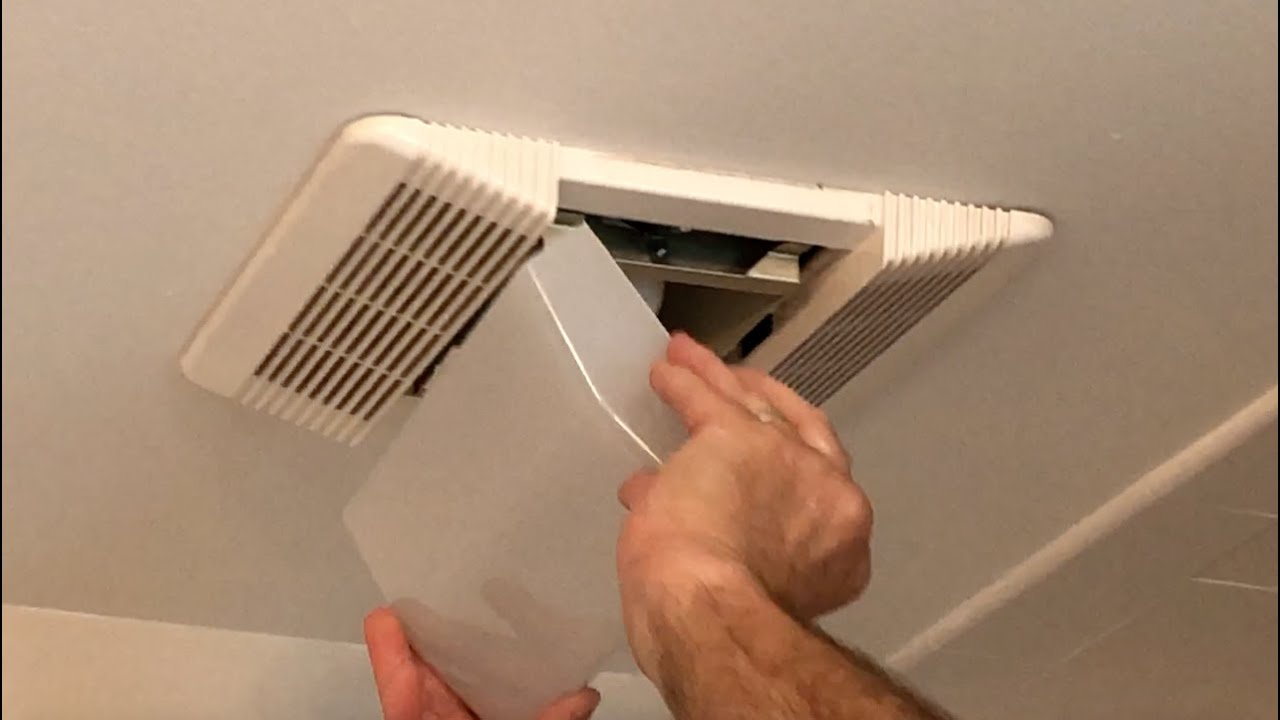
Step 4: Removing the existing LED ceiling light
Now that you have turned off the power, it’s time to remove the existing LED ceiling light. Follow these steps to safely uninstall the old fixture:
- Use a ladder or scaffolding to reach the ceiling light fixture. Ensure that the ladder is stable and secure before climbing.
- Inspect the existing fixture to determine how it is attached to the ceiling. Most LED ceiling lights are held in place by screws or a mounting bracket.
- If there are screws visible, locate and remove them using a suitable screwdriver. Set aside the screws in a safe place as you will need them later.
- If the fixture is held in place by a mounting bracket, carefully unhook or untwist it from the bracket.
- Gently lower the fixture down from the ceiling. Be cautious as the fixture may still be connected to the electrical wiring.
- Once the fixture is disconnected from the ceiling, set it aside and clean the area if necessary.
Take your time during this step to ensure a smooth removal process. Be careful not to damage the ceiling or any surrounding fixtures. Handling the fixture with care will make it easier to reinstall or dispose of later.
With the existing LED ceiling light removed, we can now move on to Step 5: Disconnecting the wiring.
Step 5: Disconnecting the wiring
Before installing the new LED ceiling light, you’ll need to disconnect the wiring from the old fixture. Follow these steps to safely disconnect the wiring:
- Double-check that the power is switched off at the main electrical panel for the lighting circuit you are working on.
- Inspect the wiring connections that are currently attached to the existing LED ceiling light fixture.
- Identify the wire connectors or terminal screws that secure the electrical wires.
- Using wire cutters or strippers, carefully remove any electrical tape or wire insulation to expose the wire ends.
- If there are wire connectors, twist them counterclockwise to loosen and detach the wires. Keep track of which wires are connected together as you will need this information for reconnection later.
- If there are terminal screws, loosen them with a suitable screwdriver and carefully detach the wires from the fixture.
- Once the wiring connections are released, gently pull the wires away from the old fixture to ensure they are fully disconnected.
- If necessary, use electrical tape to individually cover the exposed wire ends to prevent accidental contact with other wires or surfaces.
Take your time during this step and handle the wiring with care. Avoid pulling or yanking the wires forcefully, as this can cause damage or loosen connections in the electrical system.
With the wiring safely disconnected, we can now proceed to Step 6: Installing the new LED ceiling light.
Step 6: Installing the new LED ceiling light
Now that the old LED ceiling light and wiring are disconnected, it’s time to install the new fixture. Follow these steps to properly install the new LED ceiling light:
- Carefully position the new LED ceiling light fixture close to the installation location. Make sure you have a secure grip on the fixture to avoid dropping it.
- If necessary, attach a mounting bracket to the ceiling using screws and a screwdriver. Ensure that the bracket is level and securely fastened to provide a stable base for the fixture.
- Hold the new fixture in place, lining up the mounting holes (if any) with the corresponding holes in the bracket or ceiling.
- Insert the provided screws into the mounting holes and tighten them with a screwdriver until the fixture is securely fastened to the ceiling.
- Take note of any wire leads or hanging hooks that may be present on the new fixture. These should be properly secured to the bracket or ceiling for added stability.
- Double-check that all connections and wires are properly positioned and aligned before proceeding.
It’s worth mentioning that each LED ceiling light fixture may have slightly different installation instructions. Therefore, it’s important to refer to the manufacturer’s instructions that accompany your specific fixture for accurate and detailed guidance.
With the new LED ceiling light fixture successfully installed, we can now move on to Step 7: Connecting the wiring.
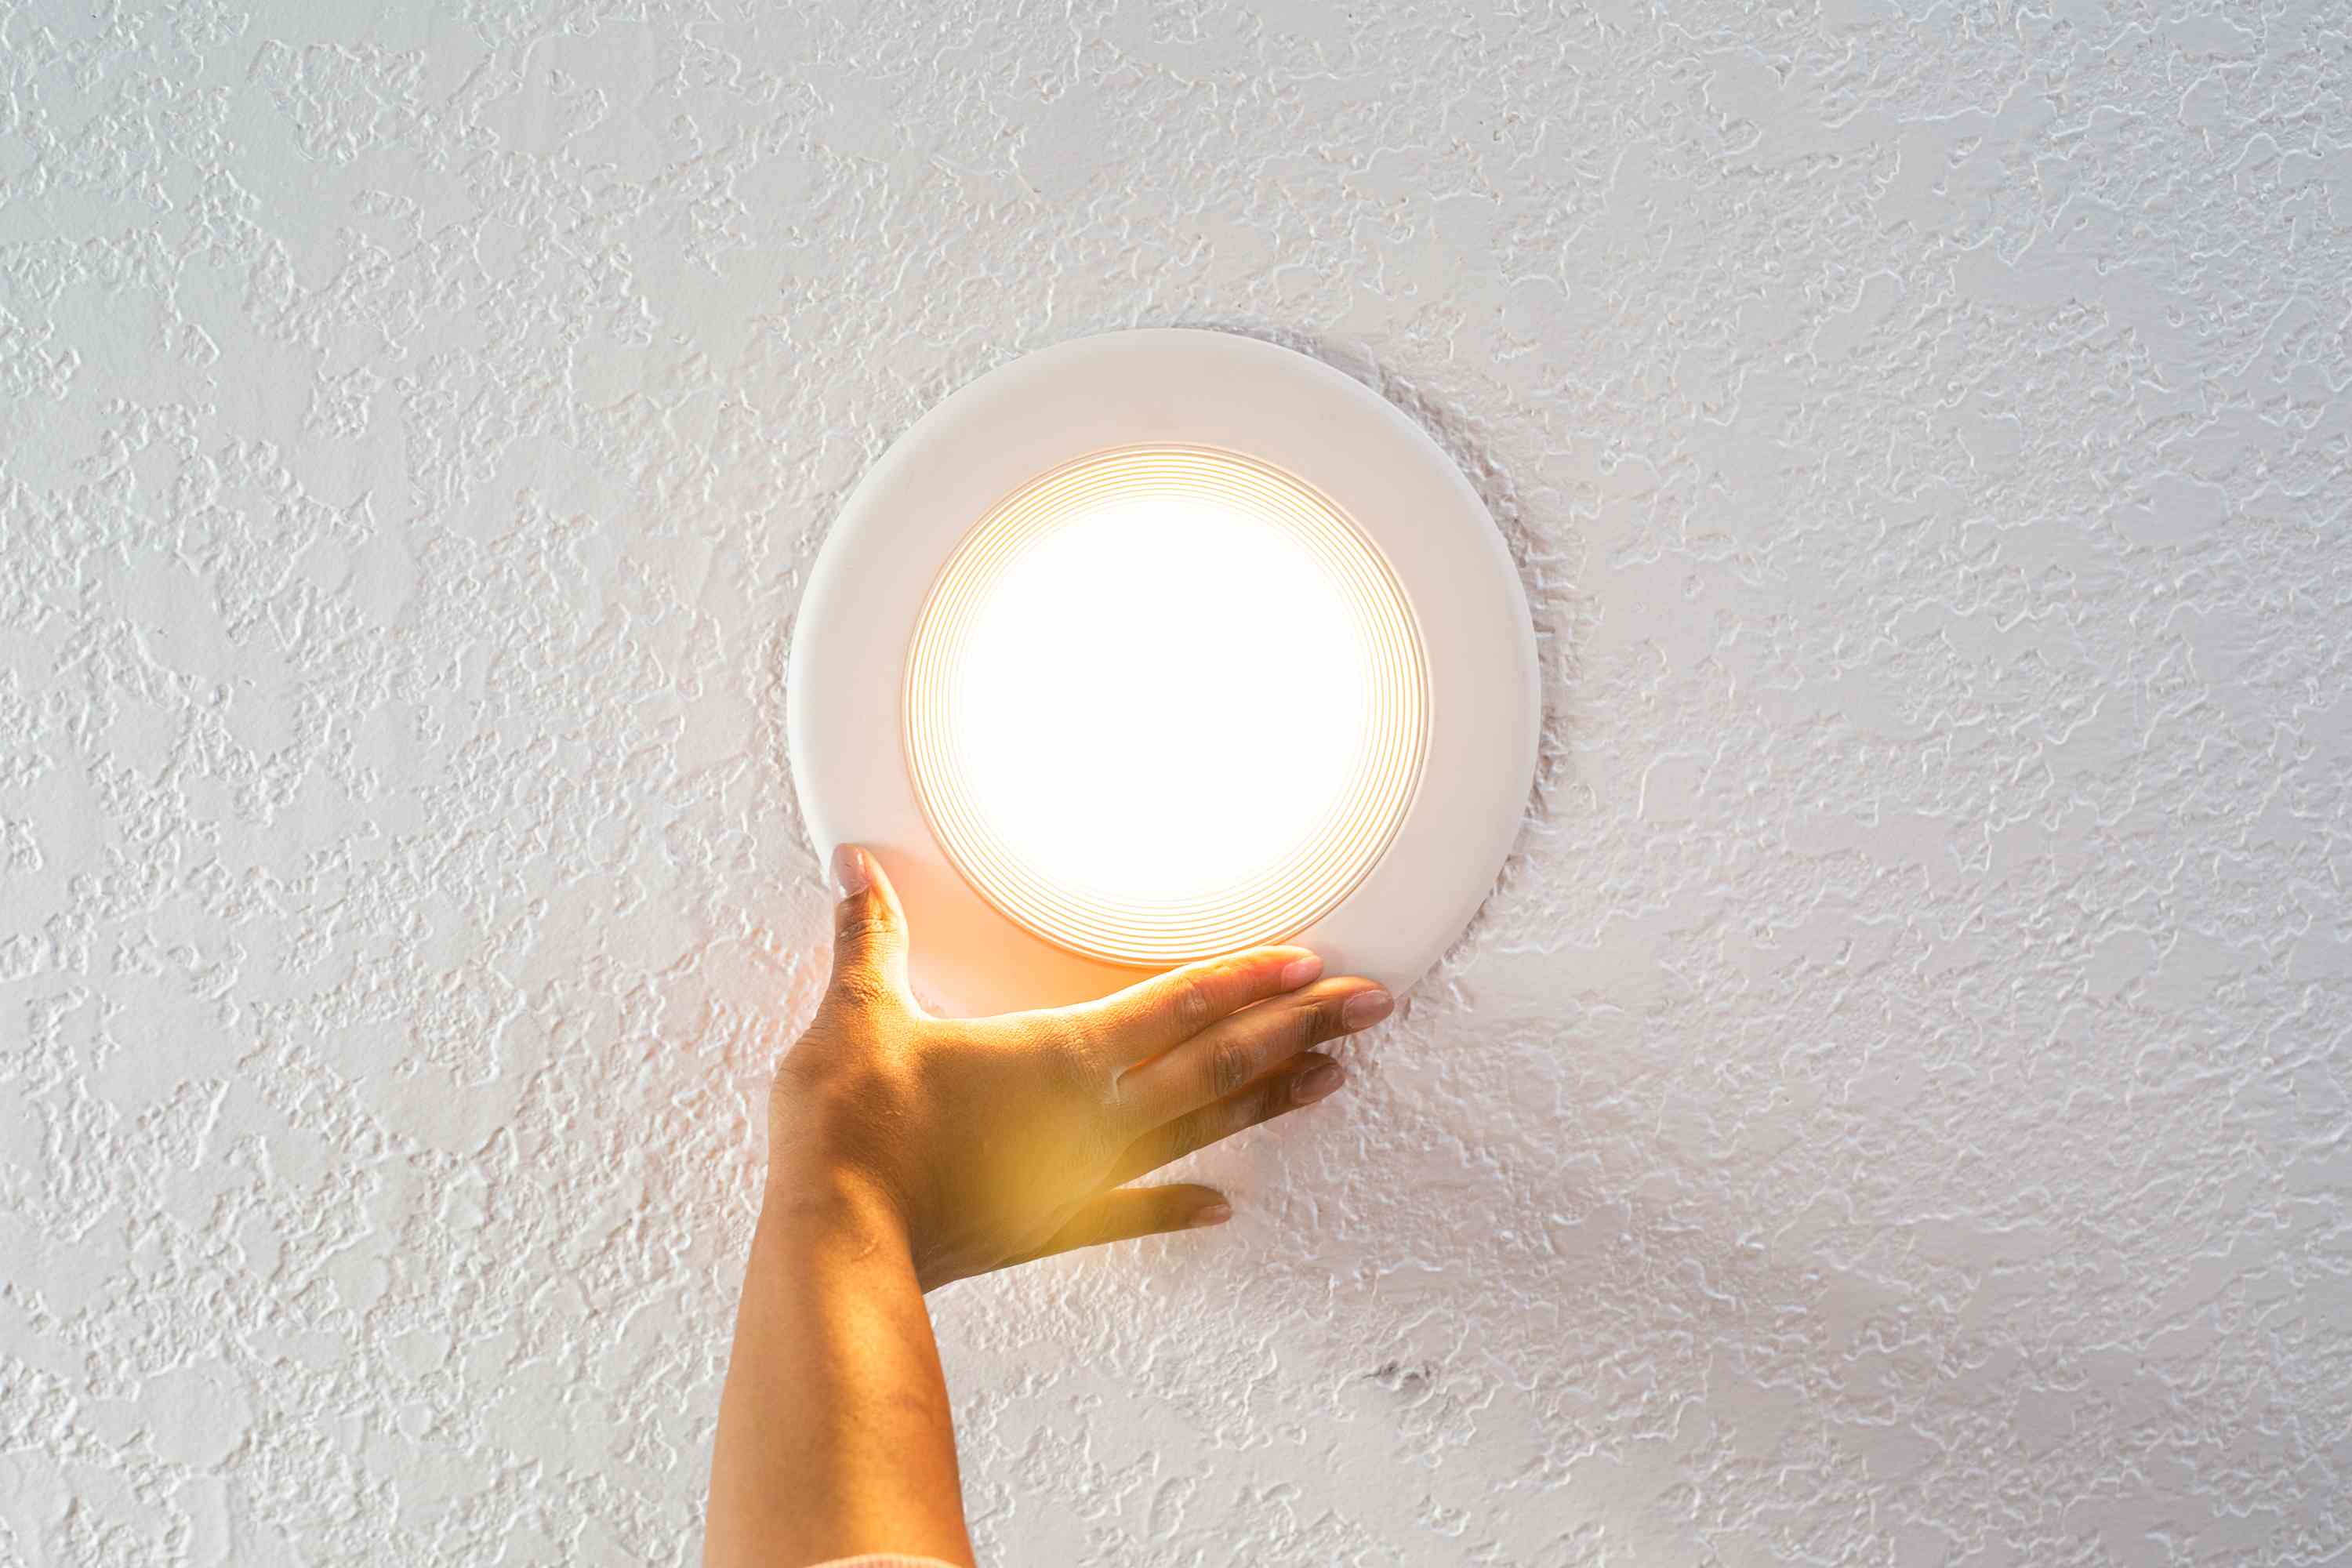
When changing an LED ceiling light, make sure to turn off the power at the circuit breaker to avoid any electrical accidents. Use a ladder or step stool to reach the light safely, and follow the manufacturer’s instructions for removing and installing the new LED light.
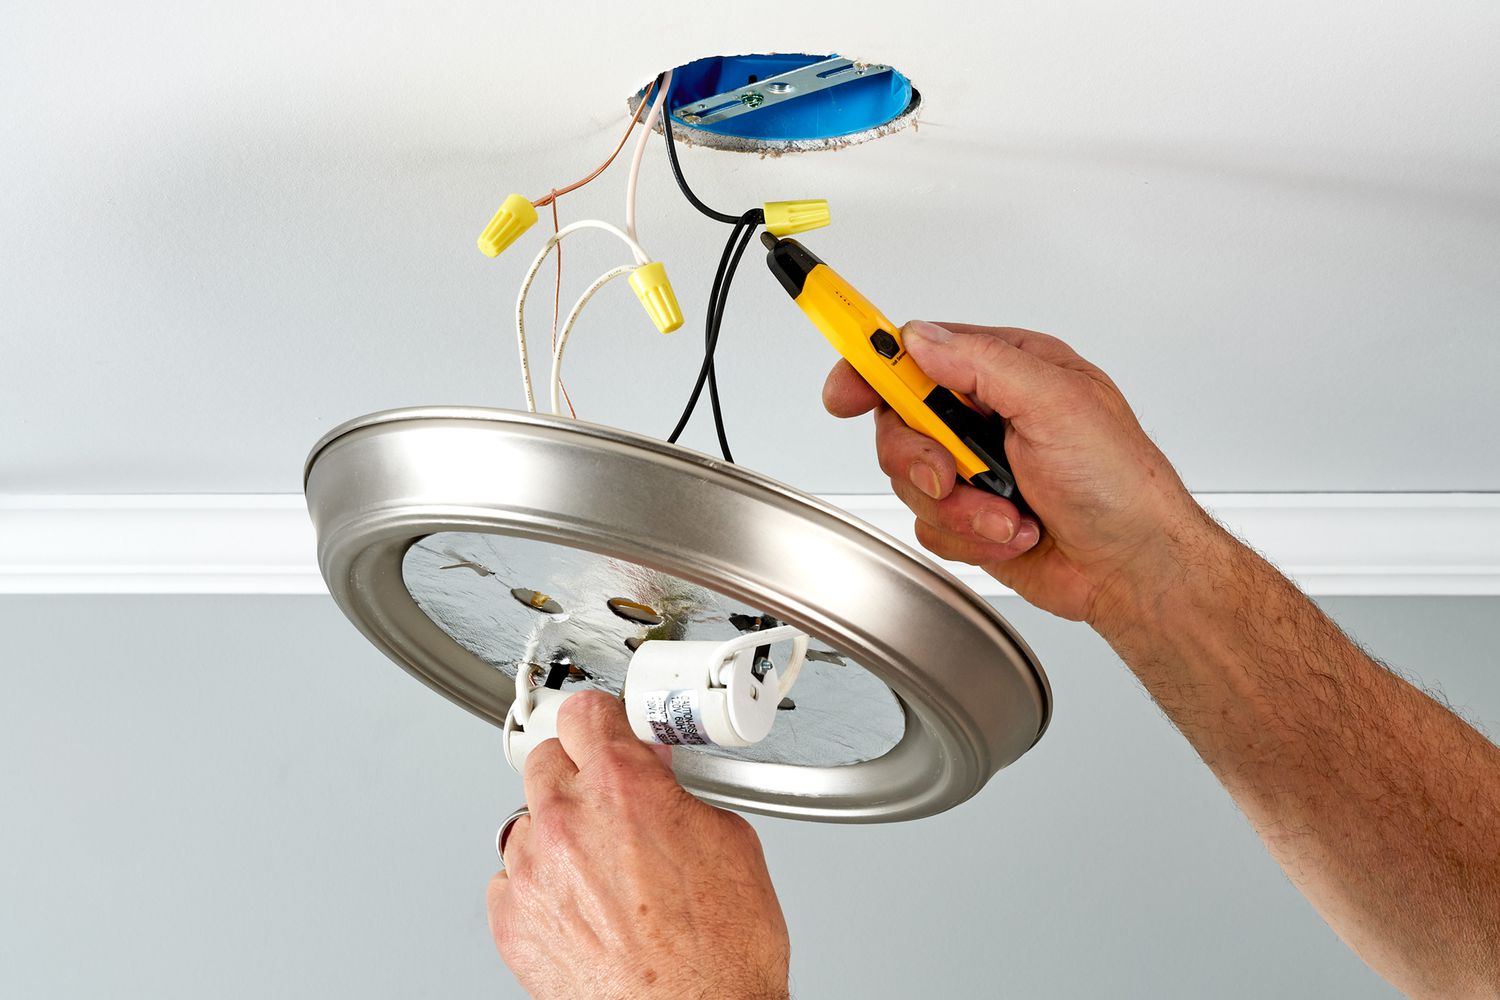
Step 7: Connecting the wiring
With the new LED ceiling light fixture securely in place, it’s time to connect the wiring. Follow these steps to ensure a proper and safe connection:
- Inspect the wiring on the new LED ceiling light fixture and separate the individual wires.
- Identify the corresponding wires from the ceiling electrical box, taking note of their color-coded insulation.
- If necessary, strip approximately 3/4 inch of insulation from the ends of the wires using wire strippers.
- Match the colored wires together: connect the black wire to the black wire, the white wire to the white wire, and the green or bare copper wire (ground wire) to the grounding screw or wire.
- Secure each wire connection by twisting it clockwise and covering it with a wire connector. Ensure that the connections are tight and secure.
- Wrap electrical tape around the wire connectors to provide additional insulation and secure the connections.
- Gently push the connected wires into the electrical box, ensuring they are not pinched or in contact with any metal parts.
It’s crucial to pay close attention to the proper color coding and connection of the wires. Connecting the wrong wires can result in improper functioning of the LED ceiling light or potential electrical hazards.
If you’re unsure about the wiring connections or have any doubts, it’s recommended to consult a qualified electrician for assistance, as this step involves working with electrical components.
With the wiring properly connected, we can now proceed to Step 8: Testing the new LED ceiling light.
Step 8: Testing the new LED ceiling light
After successfully connecting the wiring, it’s time to test the new LED ceiling light to ensure that it is functioning properly. Follow these steps to test the light:
- Turn on the power at the main electrical panel for the lighting circuit that you previously turned off.
- Double-check that the light switch connected to the LED ceiling light is in the “on” position.
- Step back and observe the new LED ceiling light fixture for any signs of illumination or malfunction.
- If the light does not turn on, check the wiring connections to ensure they are secure and correctly matched.
- If the issue persists, switch off the power again and inspect the wiring connections for any loose or damaged wires. Recheck the connections and try again.
- If the light still fails to turn on, there may be an issue with the fixture itself. Consult the manufacturer’s instructions or contact their customer support for further assistance.
Ensure that you carefully follow the manufacturer’s instructions for testing the LED ceiling light. Some fixtures may have specific instructions or features that require additional steps or considerations.
It’s important to take your time and address any issues or concerns before proceeding to the final steps. Proper testing will ensure that the new LED ceiling light is working correctly and providing the desired illumination in your space.
With the new LED ceiling light successfully tested, we can now move on to Step 9: Securing the light fixture in place.
Step 9: Securing the light fixture
Once you have tested the functionality of the new LED ceiling light and ensured that it is working properly, it’s time to secure the light fixture in place. Follow these steps to ensure a stable and secure installation:
- If there are any screws or locking mechanisms provided with the new LED ceiling light, locate them.
- Position the screws or engage the locking mechanism to secure the light fixture to the mounting bracket or ceiling.
- Tighten the screws or secure the locking mechanism firmly, but be careful not to overtighten, as this can damage the fixture or mounting hardware.
- Gently tug on the fixture to check if it is securely attached to the ceiling and does not wiggle or move.
Ensuring that the light fixture is securely fastened will prevent it from falling or shifting over time. A stable installation not only enhances safety but also helps maintain proper alignment and functionality of the LED ceiling light.
With the light fixture securely in place, we can now proceed to the final step: Step 10: Turning the power back on.
Step 10: Turning the power back on
Now that you have completed the installation and secured the new LED ceiling light, it’s time to turn the power back on. Follow these steps to restore power:
- Double-check that all the wiring connections and light fixture installations are properly completed and secure.
- Close the electrical panel door if it was opened during the process.
- Return to the main electrical panel and locate the circuit breaker that controls the lighting circuit.
- Switch the circuit breaker back to the “on” position. You should hear or feel a click indicating that the power has been restored.
- Wait for a few moments to allow the LED ceiling light to power up and illuminate. Typically, LED lights turn on instantly, but some models may take a brief moment to reach full brightness.
- Test the light switch associated with the LED ceiling light to ensure that it is functioning properly, turning the light on and off as desired.
- Observe the LED ceiling light for any signs of abnormal flickering, dimming, or unusual behavior. If you notice any issues, switch off the power and double-check the wiring connections.
It’s important to note that if there are any lingering issues or concerns with the LED ceiling light or the electrical system, it’s best to consult a qualified electrician for further assistance. They can help diagnose and resolve any underlying issues for a safe and reliable lighting installation.
With the power restored and the LED ceiling light fully operational, you have successfully completed the process of changing an LED ceiling light. Enjoy the enhanced illumination and energy efficiency provided by your new fixture!
Remember, if you ever need to make adjustments or repairs in the future, don’t hesitate to refer back to this guide or seek professional help for guidance.
Congratulations on your DIY project accomplishment!
Read more: How To Change A Christmas Light Bulb
Conclusion
Changing an LED ceiling light may seem like a daunting task, but with the right knowledge and precautions, it can be a rewarding DIY project. By following the step-by-step guide outlined in this article, you can confidently and safely replace your old ceiling light with a new LED fixture.
We started by emphasizing the importance of safety, emphasizing the need to turn off the power and wear protective gear. We then discussed the significance of gathering the necessary tools and materials beforehand to ensure a smooth installation process.
Through turning off the power, removing the existing LED ceiling light, disconnecting the wiring, and installing the new fixture, we took you through each crucial step. We also highlighted the importance of testing the new LED ceiling light for proper functionality before securing it in place.
Finally, we capped off the process by turning the power back on and concluding the installation. Remember, if you encounter any difficulties or have any concerns throughout the process, it’s always best to consult a qualified electrician.
Changing an LED ceiling light not only enhances the lighting in your space but also offers energy efficiency and longevity advantages. With the right tools, knowledge, and safety precautions in place, you can confidently upgrade your lighting fixture and enjoy the benefits of modern LED technology.
We hope this comprehensive guide has provided you with the necessary information and guidance to successfully change an LED ceiling light in your home. With proper care and attention, your new LED ceiling light will illuminate your space beautifully for years to come.
Happy DIYing!
Frequently Asked Questions about How To Change An LED Ceiling Light
Was this page helpful?
At Storables.com, we guarantee accurate and reliable information. Our content, validated by Expert Board Contributors, is crafted following stringent Editorial Policies. We're committed to providing you with well-researched, expert-backed insights for all your informational needs.


0 thoughts on “How To Change An LED Ceiling Light”