Home>Interior Design>How To Repair Floor Tiles: Fix Cracks And Refinish
Interior Design
How To Repair Floor Tiles: Fix Cracks And Refinish
Modified: February 23, 2024
Learn how to repair floor tiles and fix cracks in your interior design. Also, discover the process of refinishing your tiles for a flawless finish.
(Many of the links in this article redirect to a specific reviewed product. Your purchase of these products through affiliate links helps to generate commission for Storables.com, at no extra cost. Learn more)
Introduction
Welcome to our comprehensive guide on how to repair floor tiles, specifically focusing on fixing cracks and refinishing. Floor tiles are a popular choice in many homes and businesses due to their durability and aesthetic appeal. However, over time, these tiles may develop cracks or become worn, diminishing their beauty and functionality. But fear not, as with a little know-how and the right tools, you can easily restore your floor tiles to their former glory.
Repairing floor tiles not only improves the overall appearance of your space but also prevents further damage. Cracked tiles can result in tripping hazards and may lead to water seepage, causing damage to the subfloor. By addressing these issues promptly, you can ensure the longevity of your flooring and save money on costly replacements.
In this guide, we will walk you through the step-by-step process of repairing floor tiles. We will cover everything from assessing the extent of the damage to grouting and sealing the tiles. So, whether you are a seasoned DIY enthusiast or a novice homeowner, by following these instructions, you will be able to restore your floor tiles efficiently and effectively.
Before we dive into the detailed steps, it’s worth noting that the extent of the repair work will depend on the severity of the damage and the type of tiles you have. Minor cracks or small areas of wear and tear can often be fixed without professional help. However, if you have extensive damage or expensive tiles, it may be wise to consult a professional for assistance. Now, let’s get started on the journey to repairing and refinishing your floor tiles!
Key Takeaways:
- Restore the beauty and functionality of your floor tiles by following our comprehensive guide, from assessing damage to grouting and sealing. Save money on costly replacements and enjoy a rejuvenated space.
- With the right tools and know-how, you can confidently repair and refinish your floor tiles, enhancing the aesthetics and longevity of your space. Take the first steps towards restoring your floor to its full potential!
Read more: How To Repair A Cracked Floor Tile
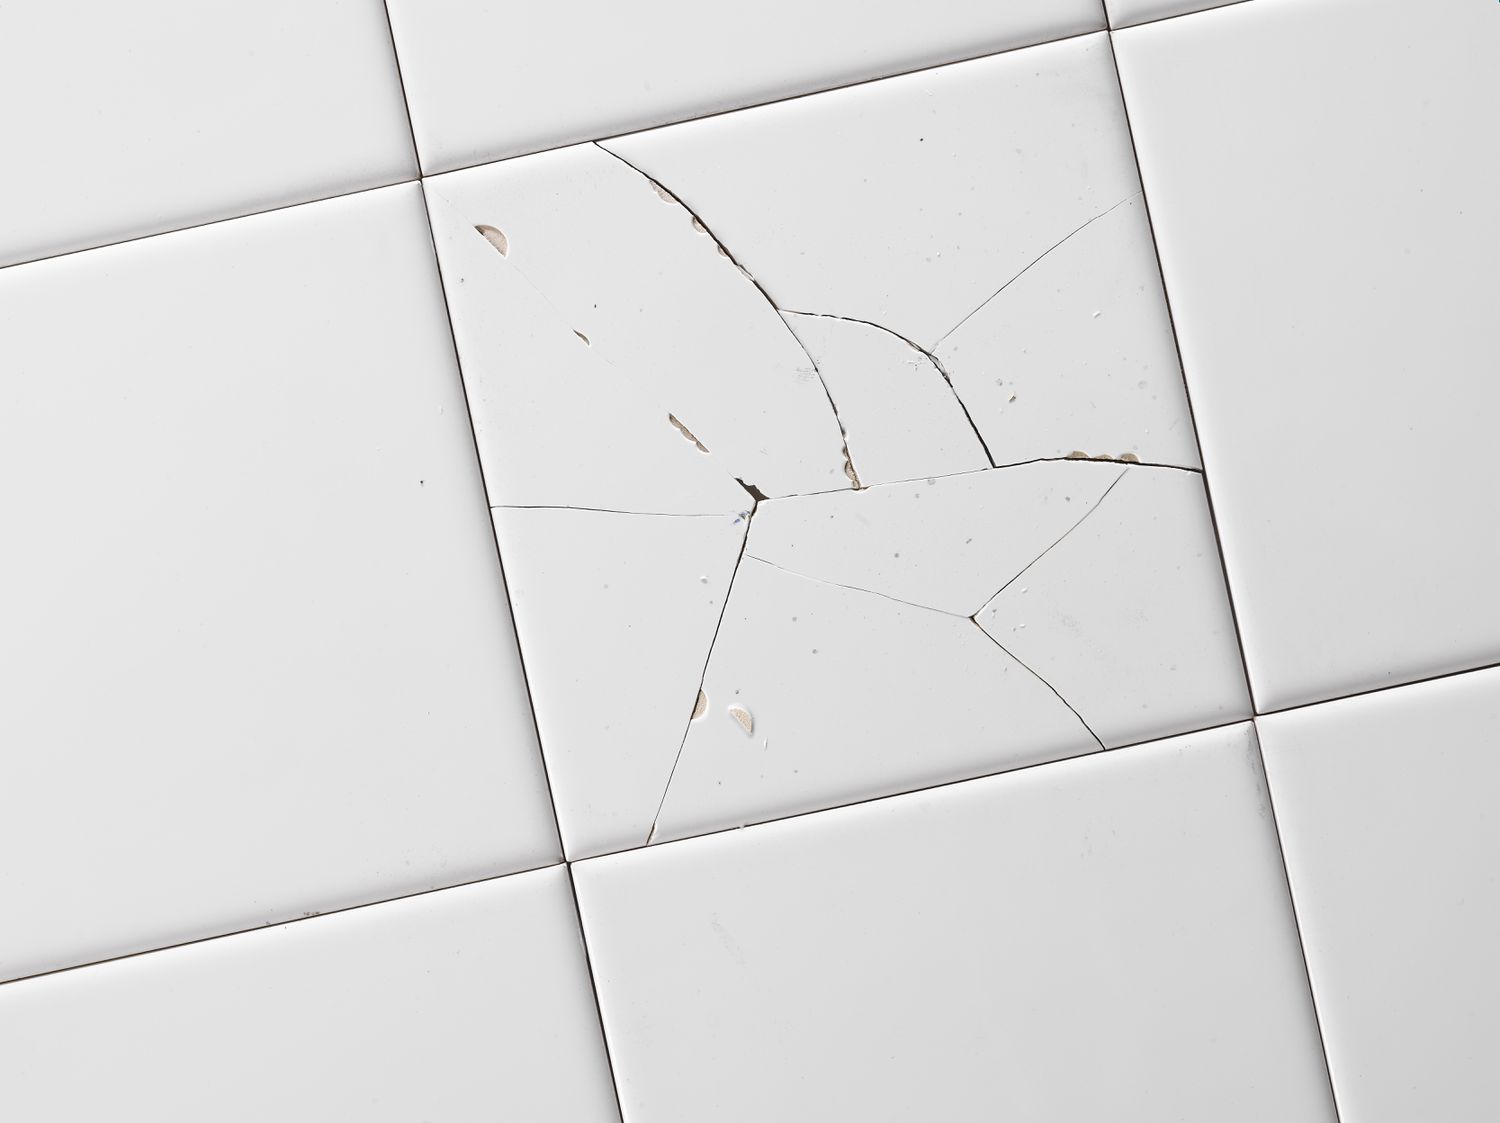
Step 1: Assessing the Damage
Before you begin repairing your floor tiles, it is crucial to carefully assess the extent of the damage. This step will help you determine the best course of action and ensure that you have all the necessary materials for the repair process.
Start by examining the cracked tile or tiles. Look for any signs of movement or loose pieces. If the tile feels loose or moves when pressure is applied, it may be an indication of a larger problem with the subfloor. In this case, it is advisable to seek professional assistance to address the underlying issue.
Next, inspect the surrounding tiles. Check for any signs of damage or wear and tear. It is important to address these issues as well, as they can affect the stability and longevity of your repaired tiles.
Once you have assessed the damage to the tiles, evaluate the condition of the grout. Look for any cracks, gaps, or areas where the grout has deteriorated. Damaged grout can allow water to seep under the tiles, causing further damage to the subfloor. If necessary, plan to regrout or touch up the grout during the repair process.
Lastly, take note of the type and size of the tiles installed. Different types of tiles, such as ceramic, porcelain, or natural stone, may require specific repair techniques or materials. Additionally, ensure that you have enough replacement tiles available in case any need to be removed and replaced.
By thoroughly assessing the damage and taking note of these details, you can proceed with confidence knowing that you have a clear understanding of what needs to be done and what materials you will need. With this information in hand, you are ready to move on to the next step: gathering the necessary tools and materials.
Step 2: Gathering the Necessary Tools and Materials
Before you begin repairing the floor tiles, it’s essential to gather all the necessary tools and materials. This will not only save you time but also ensure a smooth repair process. Here are the items you will need:
Tools:
- Tape measure
- Protective goggles and gloves
- Chisel or putty knife
- Grout remover
- Tile adhesive
- Grout float
- Grout sponge
- Hacksaw or tile cutter
- Rubber mallet
- Level
- Notched trowel
- Tile spacer
- Grout sealer
- Paintbrush or roller
Materials:
- Replacement tiles
- Grout
- Tile adhesive
- Primer (if necessary)
- Thin-set mortar
- Grout colorant (if desired)
- Sealer for the finished floor
Make sure to select tile adhesive, grout, and thin-set mortar that are compatible with your specific tile material. It’s also recommended to choose replacement tiles that closely match the color and style of the existing tiles to ensure a seamless repair.
Once you have gathered all the necessary tools and materials, it’s time to move on to the next step: removing the cracked tiles.
Read more: How To Fix Basement Floor Cracks
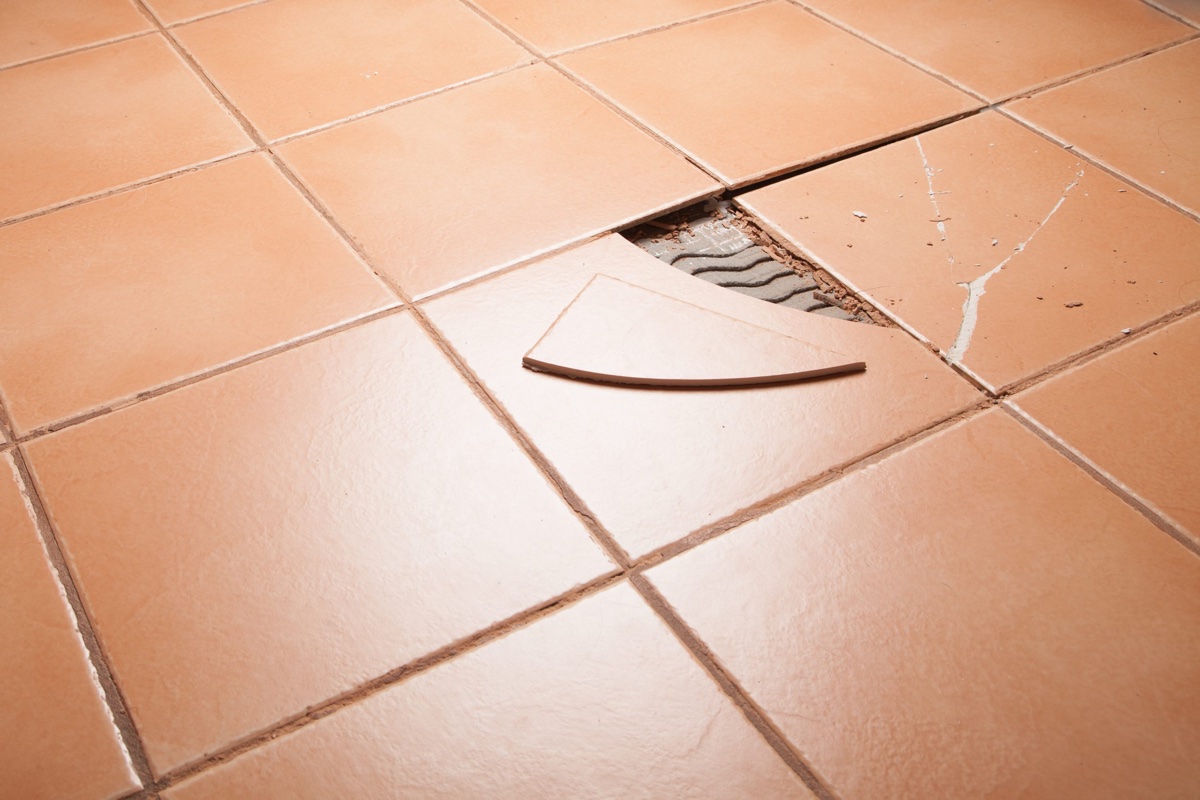
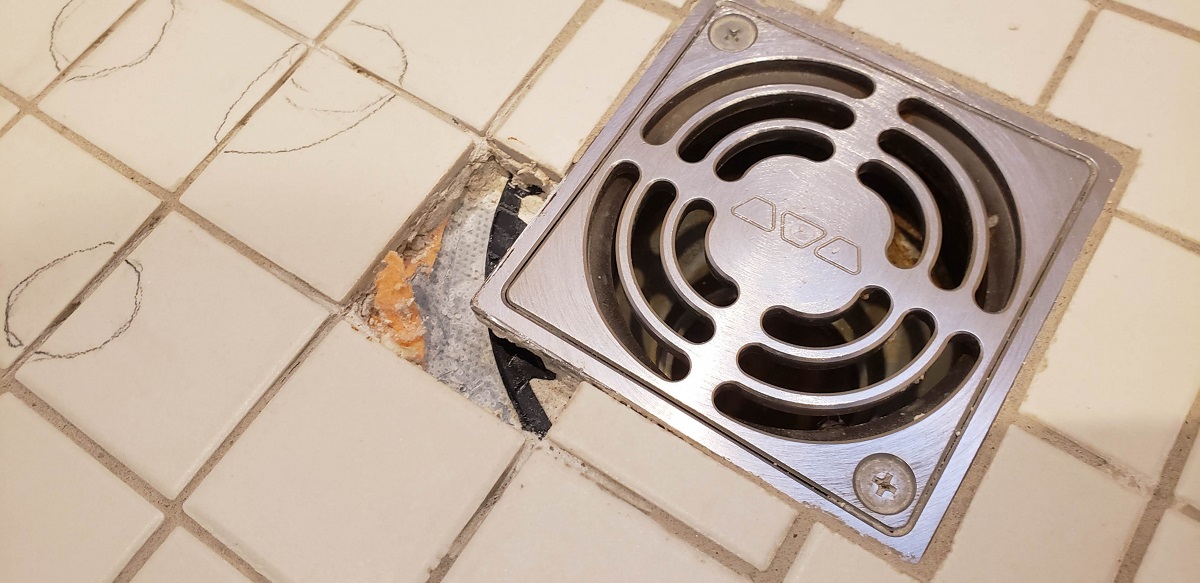
Step 3: Removing the Cracked Tiles
Now that you have assessed the damage and gathered the necessary tools and materials, it’s time to remove the cracked tiles. Follow these steps to safely and efficiently remove the damaged tiles:
- Start by wearing protective goggles and gloves to ensure your safety throughout the process.
- Use a tape measure to mark the center of the cracked tile. This will serve as a reference point for the removal process.
- Using a chisel or putty knife, gently tap the tool around the edges of the cracked tile to loosen it. Be careful not to damage the surrounding tiles.
- Once the tile is loosened, pry it up using the chisel or putty knife. Apply even pressure to lift the tile without causing any further damage.
- If the tile doesn’t come off easily, you may need to use a grout remover to loosen the grout around the edges. Carefully apply the grout remover and give it some time to work before attempting to remove the tile again.
- Repeat this process for all the cracked tiles that need to be replaced.
It’s important to note that during the removal process, you may encounter additional damage or issues with the subfloor. Take this opportunity to thoroughly inspect the subfloor and repair any cracks or other damage before proceeding to the next step.
Once you have successfully removed the cracked tiles, clean the area and remove any debris or adhesive left behind. Ensure that the surface is smooth and ready for the installation of the new tiles.
Now that the damaged tiles have been removed, it’s time to move on to the next step: repairing cracks in the subfloor (if necessary).
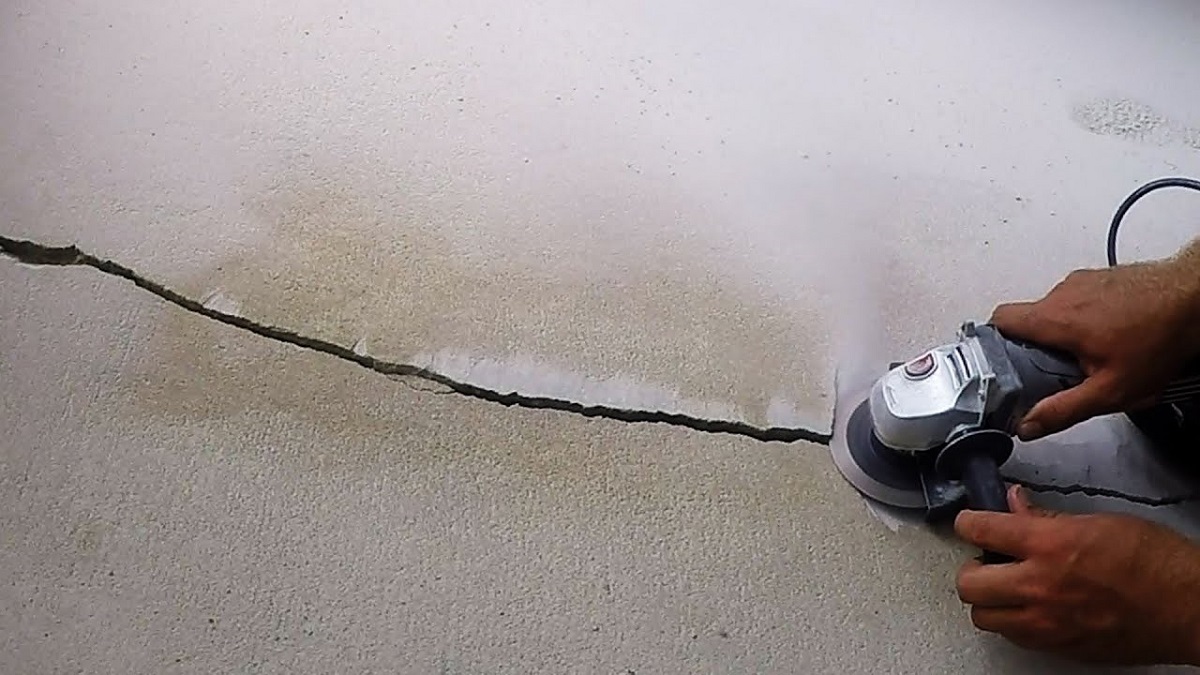
Step 4: Repairing Cracks in the Subfloor
Before proceeding with the installation of the new tiles, it’s essential to address any cracks or damage in the subfloor. Repairing these issues will ensure a stable foundation for your new tiles and prevent future problems. Follow these steps to repair cracks in the subfloor:
- Thoroughly clean the area surrounding the cracks. Remove any debris, dust, or loose particles.
- If the cracks are small, you can use a crack filler or filler compound. Apply the filler directly to the crack, smoothing it out with a putty knife. Follow the manufacturer’s instructions for the specific product you are using.
- For larger cracks or areas of damage, you may need to use a patching compound. Mix the compound according to the manufacturer’s instructions and apply it to the damaged area, smoothing it out with a trowel. Be sure to feather the edges to create a seamless transition with the rest of the subfloor.
- Allow the crack filler or patching compound to dry and cure completely. This may take several hours or even overnight, depending on the product used.
- Once the filler is dry, use sandpaper or a sanding block to smooth out any rough patches and ensure a level surface.
- Thoroughly clean the repaired area to remove any dust or debris. This will help create a strong bond between the subfloor and the new tiles.
By repairing cracks in the subfloor, you are creating a stable and even surface for the installation of the new tiles. This will ensure the longevity and durability of your repaired floor. With the subfloor ready, it’s time to move on to the next step: preparing the replacement tiles.
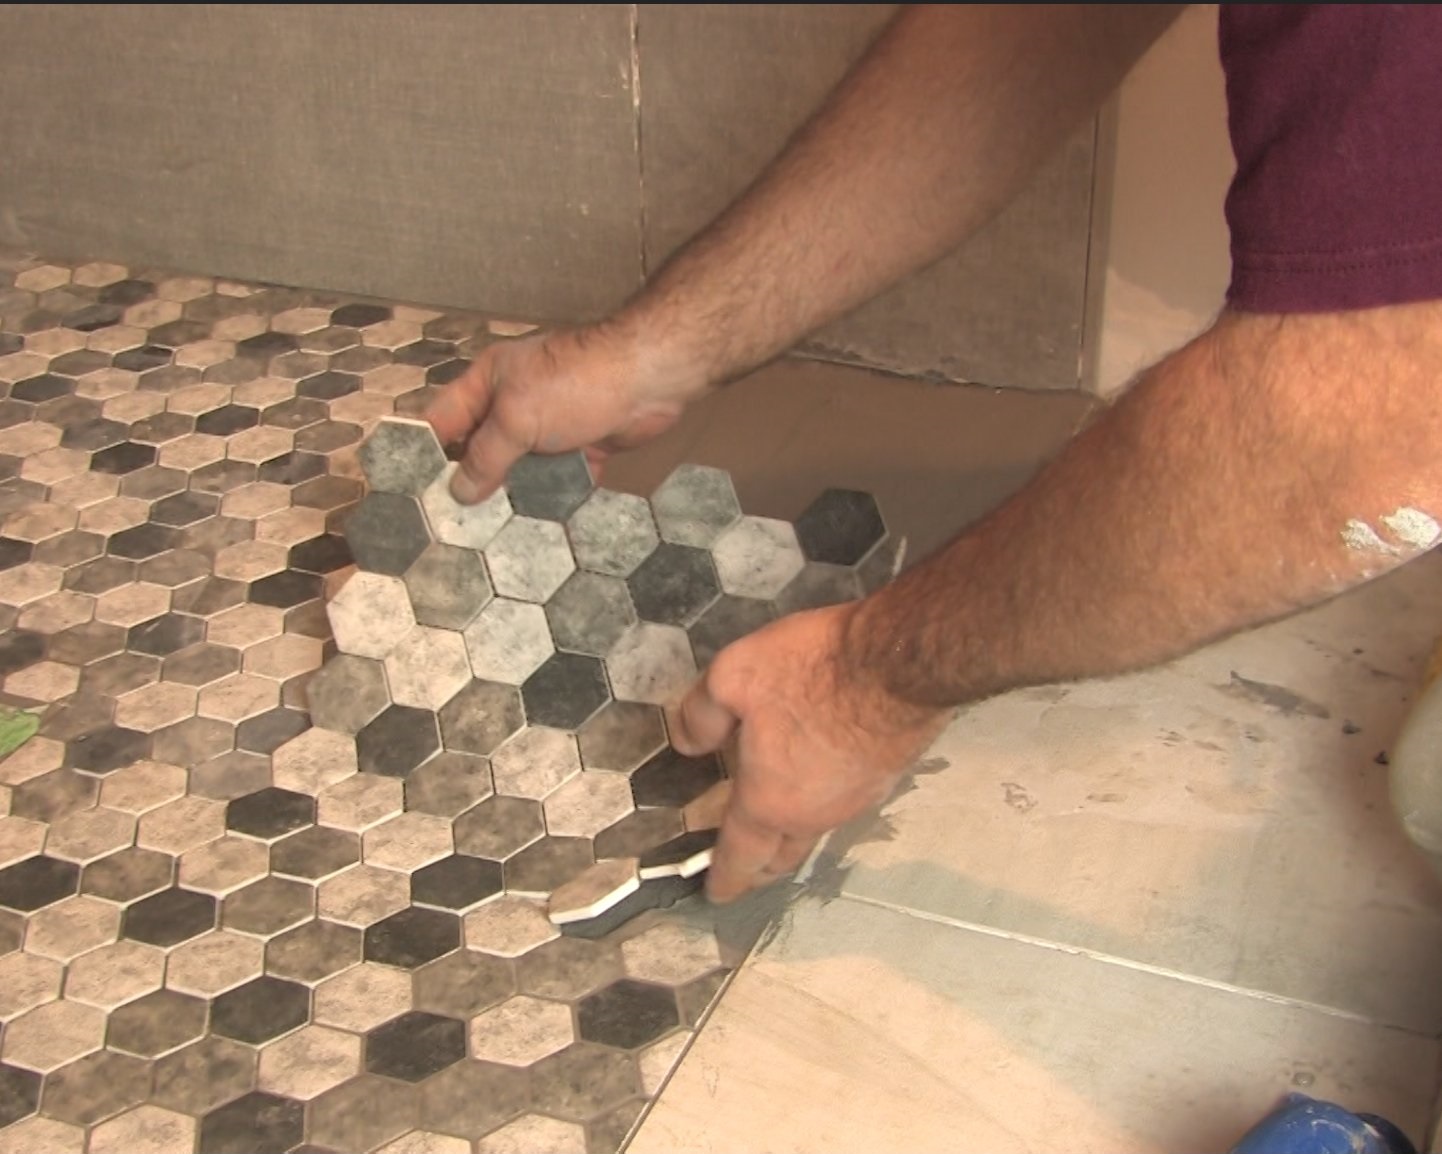
Step 5: Preparing the Replacement Tiles
With the subfloor repaired, it’s time to prepare the replacement tiles for installation. Proper preparation ensures that the tiles fit correctly and that the overall finished look is seamless. Follow these steps to prepare the replacement tiles:
- Measure the dimensions of the area where the replacement tiles will be installed. It’s important to ensure that the measurements are accurate and that you have enough replacement tiles to complete the project.
- If necessary, use a hacksaw or tile cutter to trim the replacement tiles to the desired size. Take your time and make precise cuts to achieve a clean and precise fit.
- Check the back of the replacement tiles for any adhesive residue or debris. Use a damp cloth or sponge to clean them thoroughly.
- If you are using natural stone tiles, such as marble or granite, you may need to apply a coat of sealer to protect the tiles from moisture and stains. Follow the manufacturer’s instructions for the specific sealer you are using.
- Set aside the prepared replacement tiles in a safe and easily accessible area, ready for installation.
By properly preparing the replacement tiles, you are ensuring a smooth and efficient installation process. Taking the time to measure accurately and make precise cuts will result in a professional-looking finished project. With the replacement tiles prepared, you are now ready to move on to the next step: installing the new tiles.
Use a two-part epoxy adhesive to fill in cracks in floor tiles, then sand the area smooth. Apply a new coat of tile paint or sealant to refinish the tiles and make them look like new.
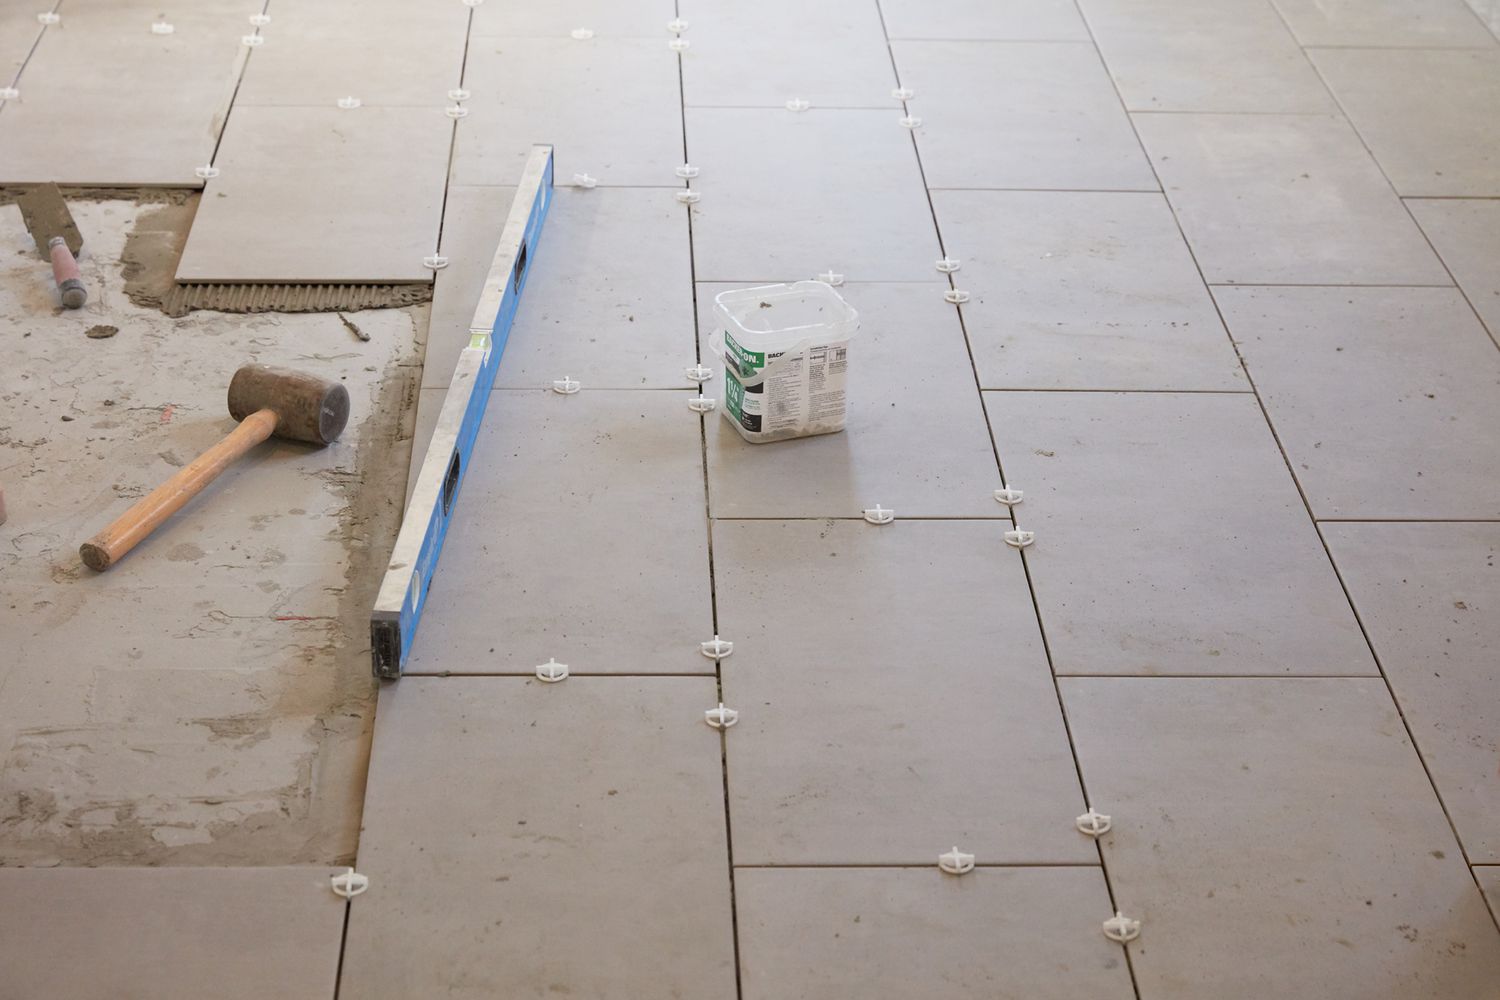
Step 6: Installing the New Tiles
Now that you’ve prepared the replacement tiles, it’s time to install them on the repaired subfloor. The installation process may vary slightly depending on the type of tiles you are working with, so always refer to the manufacturer’s instructions. Follow these general steps to install the new tiles:
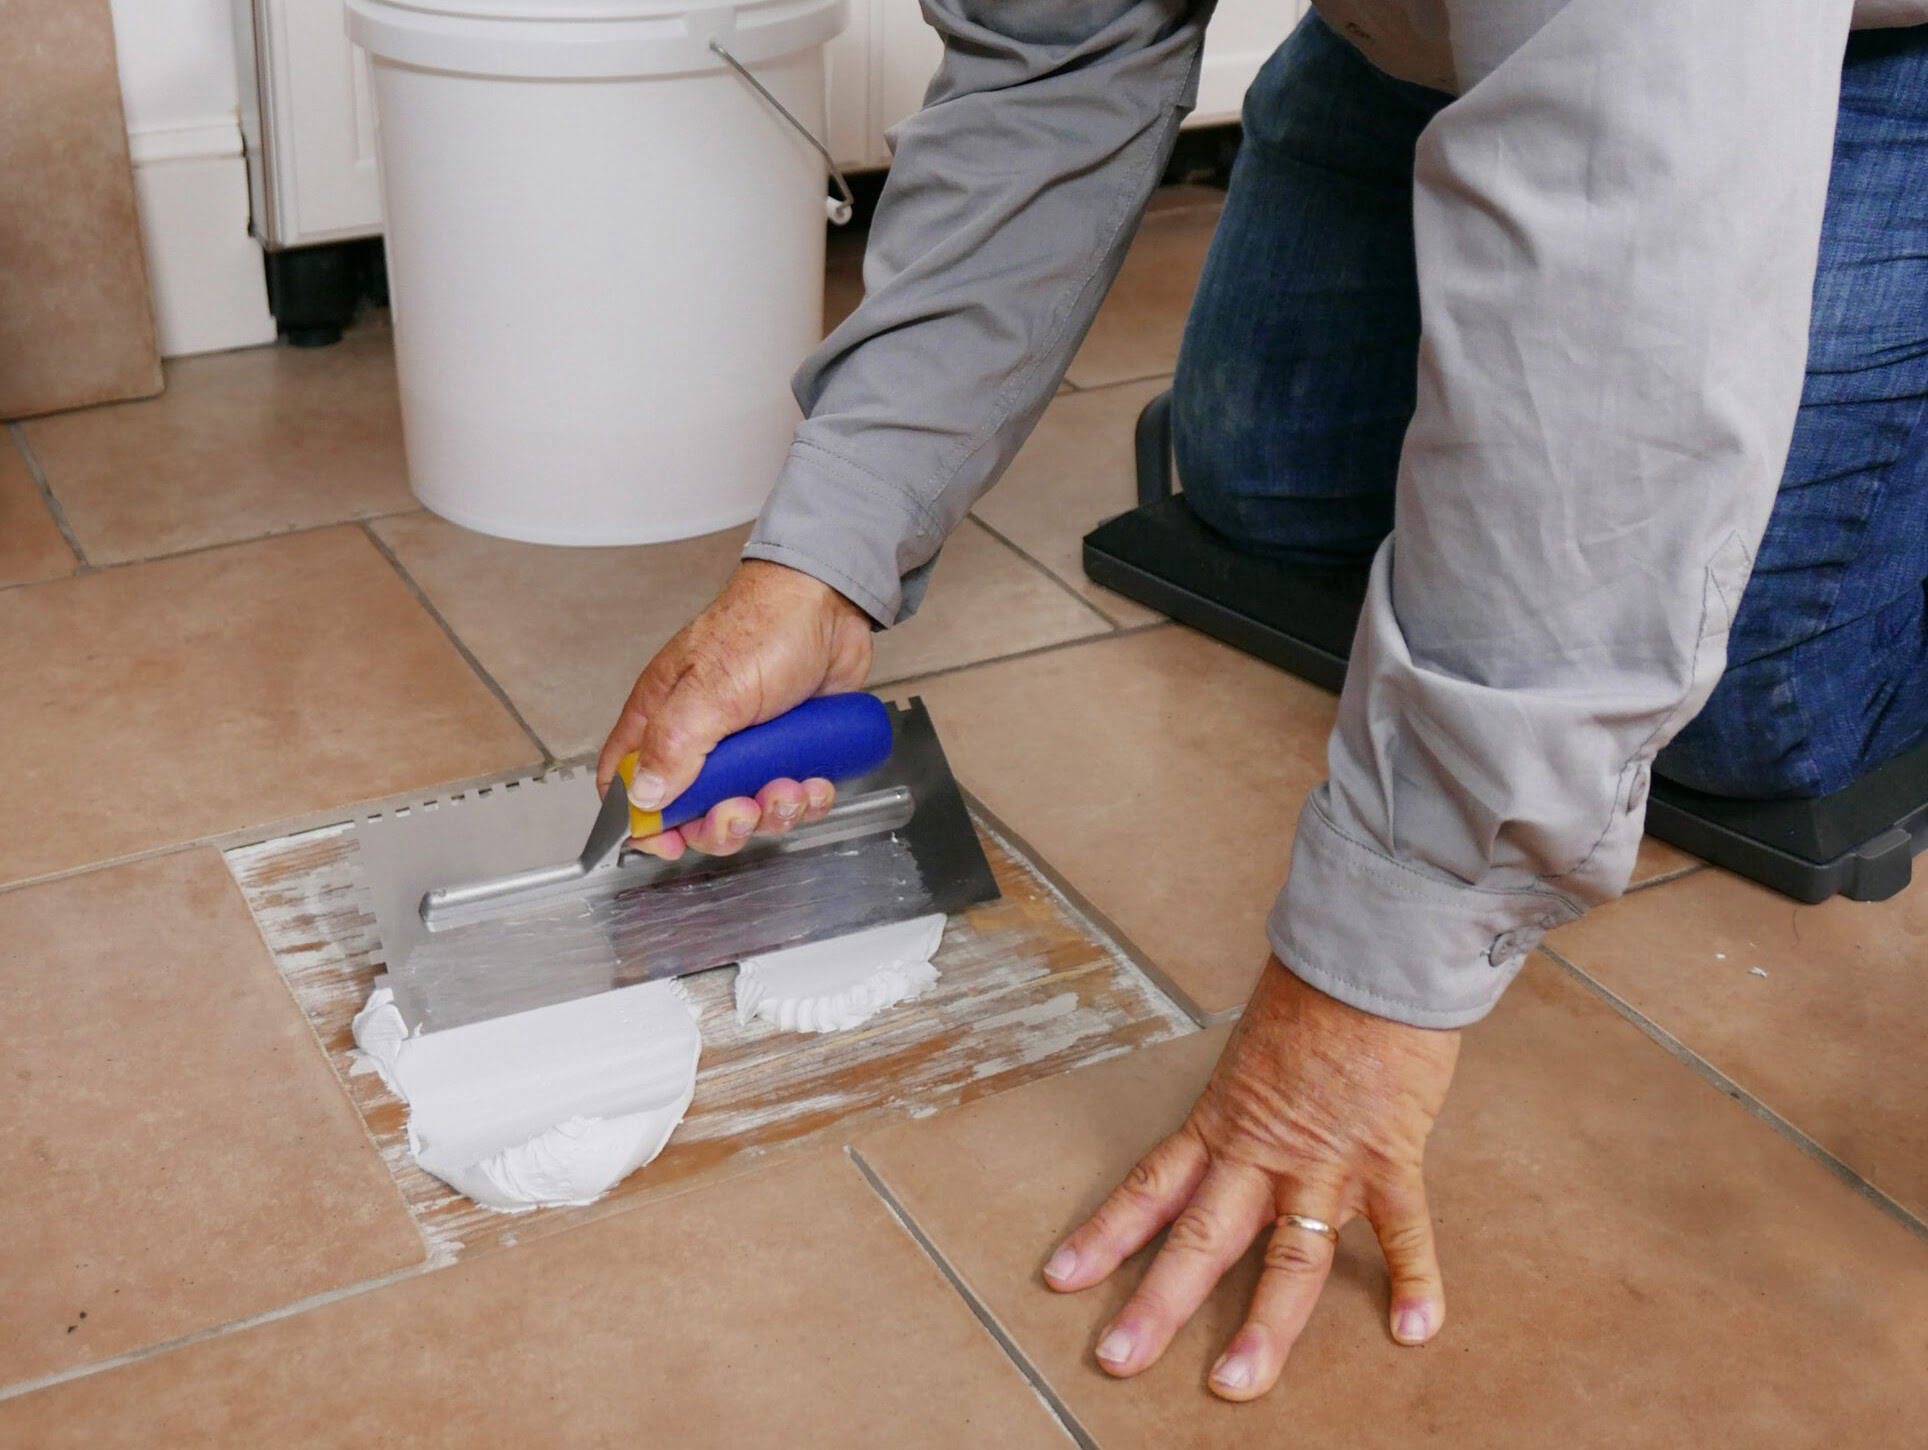
- Start by applying a thin layer of tile adhesive to the back of the replacement tile using a notched trowel. Spread the adhesive evenly, creating a ribbed texture.
- Carefully place the replacement tile onto the prepared area of the subfloor. Press it firmly into place, ensuring that it is level with the surrounding tiles. Use a rubber mallet to gently tap the tile if needed.
- Insert tile spacers around the edges of the replacement tile to create even and consistent spacing with the surrounding tiles.
- Repeat the process for each replacement tile, ensuring that they are properly aligned and evenly spaced.
- Once all the replacement tiles are installed, allow the adhesive to dry and cure as per the manufacturer’s instructions. This typically takes 24-48 hours, but it’s important to follow the specific guidelines.
- After the adhesive has completely dried, remove the tile spacers.
During the installation process, periodically check the level of the tiles to ensure they are flush with the surrounding tiles. Adjust as necessary to maintain a seamless surface.
Remember, each tile installation may have unique considerations, such as specific adhesive drying times or pattern variations. Always consult the manufacturer’s instructions for the best results.
With the new tiles properly installed, it’s time to move on to the next step: grouting and sealing the tiles.
Read more: How To Fix A Cracked Garage Floor
Step 7: Grouting and Sealing the Tiles
After the new tiles have been installed, it’s time to grout the gaps between them and seal the tiles to protect them from stains and moisture. Follow these steps to grout and seal the tiles:
- Start by preparing the grout according to the manufacturer’s instructions. Mix the grout until it reaches a smooth, paste-like consistency.
- Using a grout float, scoop up a generous amount of grout and press it into the gaps between the tiles at a 45-degree angle.
- Hold the grout float at a 90-degree angle and sweep it diagonally across the tiles, removing any excess grout from the surface. Repeat this process until all the gaps are filled and the tiles are clean.
- Allow the grout to set for the recommended time specified by the manufacturer.
- After the grout has set, dampen a grout sponge and lightly wipe away any residual grout haze from the surface of the tiles. Rinse the sponge frequently to ensure a clean finish.
- Allow the grout to dry completely before proceeding with sealing the tiles. Refer to the manufacturer’s instructions for the recommended drying time.
- Once the grout is dry, apply a tile sealer to protect the tiles from stains and moisture. Use a paintbrush or roller to evenly apply the sealer to the surface of the tiles. Follow the manufacturer’s instructions for the specific sealer you are using.
- Allow the sealer to dry completely before walking on or placing any furniture on the newly repaired floor.
Grouting and sealing the tiles are crucial steps to ensure the longevity and aesthetics of your repaired floor. The grout fills in the gaps between the tiles, providing stability and preventing water seepage. The sealer creates a protective barrier, making the tiles easier to clean and maintain in the long run.
With the grouting and sealing complete, it’s time for the final step: cleaning and refinishing the floor.
Step 8: Cleaning and Refinishing the Floor
Once you have completed the grouting and sealing process, it’s important to give your repaired floor a thorough cleaning and finish it off with a refinishing touch. Follow these steps to effectively clean and refinish your floor:
- Start by sweeping or vacuuming the floor to remove any loose debris or dirt.
- Prepare a bucket of warm water and add a mild floor cleaner according to the manufacturer’s instructions.
- Using a mop or a soft cloth, thoroughly clean the surface of the tiles, paying attention to any grout lines or stubborn stains. Avoid using harsh chemicals or abrasive cleaning agents that could damage the tiles.
- Rinse the floor with clean water to remove any remaining cleaner residue.
- Dry the floor completely using a clean towel or allow it to air dry naturally.
- Inspect the floor for any remaining grout haze or marks. If necessary, use a grout haze remover or a soft scrub brush to gently clean the tiles.
- Once the floor is clean and dry, apply a coat of floor finish or polish to enhance its appearance and protect it from wear and tear. Follow the manufacturer’s instructions for the specific finish you are using.
- Allow the finish to dry completely before walking on or placing any furniture on the floor.
Regular maintenance and cleaning will help preserve the beauty and durability of your repaired floor. Remember to follow recommended cleaning and maintenance practices to extend the lifespan of your floor and keep it looking its best.
Congratulations! You have successfully repaired, cleaned, and refinished your floor tiles. By taking the time to assess the damage, gather the necessary tools, and follow these step-by-step instructions, you have restored the beauty and functionality of your floor. Enjoy the fresh, rejuvenated look of your space!
Conclusion
Repairing floor tiles, whether it be fixing cracks or refinishing the surface, is a rewarding process that can breathe new life into your space. By following the step-by-step guide we have provided, you can confidently tackle these repairs and achieve professional-looking results.
Assessing the damage, gathering the necessary tools and materials, and removing the cracked tiles are crucial initial steps. Repairing any cracks in the subfloor and preparing the replacement tiles ensure a stable foundation for the new tiles. Installing the new tiles, grouting and sealing them, and finally, cleaning and refinishing the floor, complete the restoration process.
Throughout this guide, we’ve emphasized the importance of carefully following manufacturer’s instructions, using proper safety precautions, and taking time to achieve accurate measurements and clean installations. These practices will ensure the longevity and beauty of your repaired floor tiles.
Remember, if the damage is significant or the tiles are expensive, it’s always wise to consult a professional for assistance. They have the expertise and specialized equipment to handle complex repairs and ensure the best outcome for your floor.
By effectively repairing and maintaining your floor tiles, you not only enhance the aesthetics of your space but also add value and protect your investment. Whether you’re a seasoned DIY enthusiast or a novice homeowner, investing time and effort into restoring your floor tiles is a worthwhile endeavor that will yield long-lasting results.
So, roll up your sleeves, gather your tools, and take the first steps towards repairing and refinishing your floor tiles. Enjoy the beauty and sense of accomplishment that comes with restoring your space to its full potential!
Frequently Asked Questions about How To Repair Floor Tiles: Fix Cracks And Refinish
Was this page helpful?
At Storables.com, we guarantee accurate and reliable information. Our content, validated by Expert Board Contributors, is crafted following stringent Editorial Policies. We're committed to providing you with well-researched, expert-backed insights for all your informational needs.


0 thoughts on “How To Repair Floor Tiles: Fix Cracks And Refinish”