Articles
How To Repair Loose Floor Tiles
Modified: August 26, 2024
Learn how to repair loose floor tiles with our informative articles. Fixing loose tiles is easy with our step-by-step guides and tips.
(Many of the links in this article redirect to a specific reviewed product. Your purchase of these products through affiliate links helps to generate commission for Storables.com, at no extra cost. Learn more)
Introduction
Loose floor tiles can be a common issue in many households. Whether it’s due to wear and tear over time or improper installation, having a loose tile not only detracts from the appearance of your floor but also poses a potential tripping hazard. Thankfully, repairing loose floor tiles is a relatively simple DIY task that can save you time and money.
In this article, we will guide you through the step-by-step process of repairing loose floor tiles. We’ll cover how to assess the damage, gather the necessary materials and tools, remove the loose tile, prepare the surface, apply adhesive, reinstall the tile, level and grout, and finally, clean and finish the area.
Before we dive into the repair process, it’s important to note that if you have a large area of loose tiles or if you’re unsure about your DIY skills, it’s always best to consult a professional. However, for smaller repairs and confident DIY enthusiasts, let’s get started in tackling those loose floor tiles.
Key Takeaways:
- Repairing loose floor tiles is a manageable DIY task that can save time and money. Assess the damage, gather materials, remove the loose tile, prepare the surface, apply adhesive, reinstall the tile, level and grout, and finish with cleaning.
- Prioritize safety and attention to detail when repairing loose floor tiles. Consult a professional for large areas or if unsure about DIY skills. Prompt repairs not only enhance appearance but also prevent further damage and protect the subfloor.
Read more: How To Put Tile On Floor
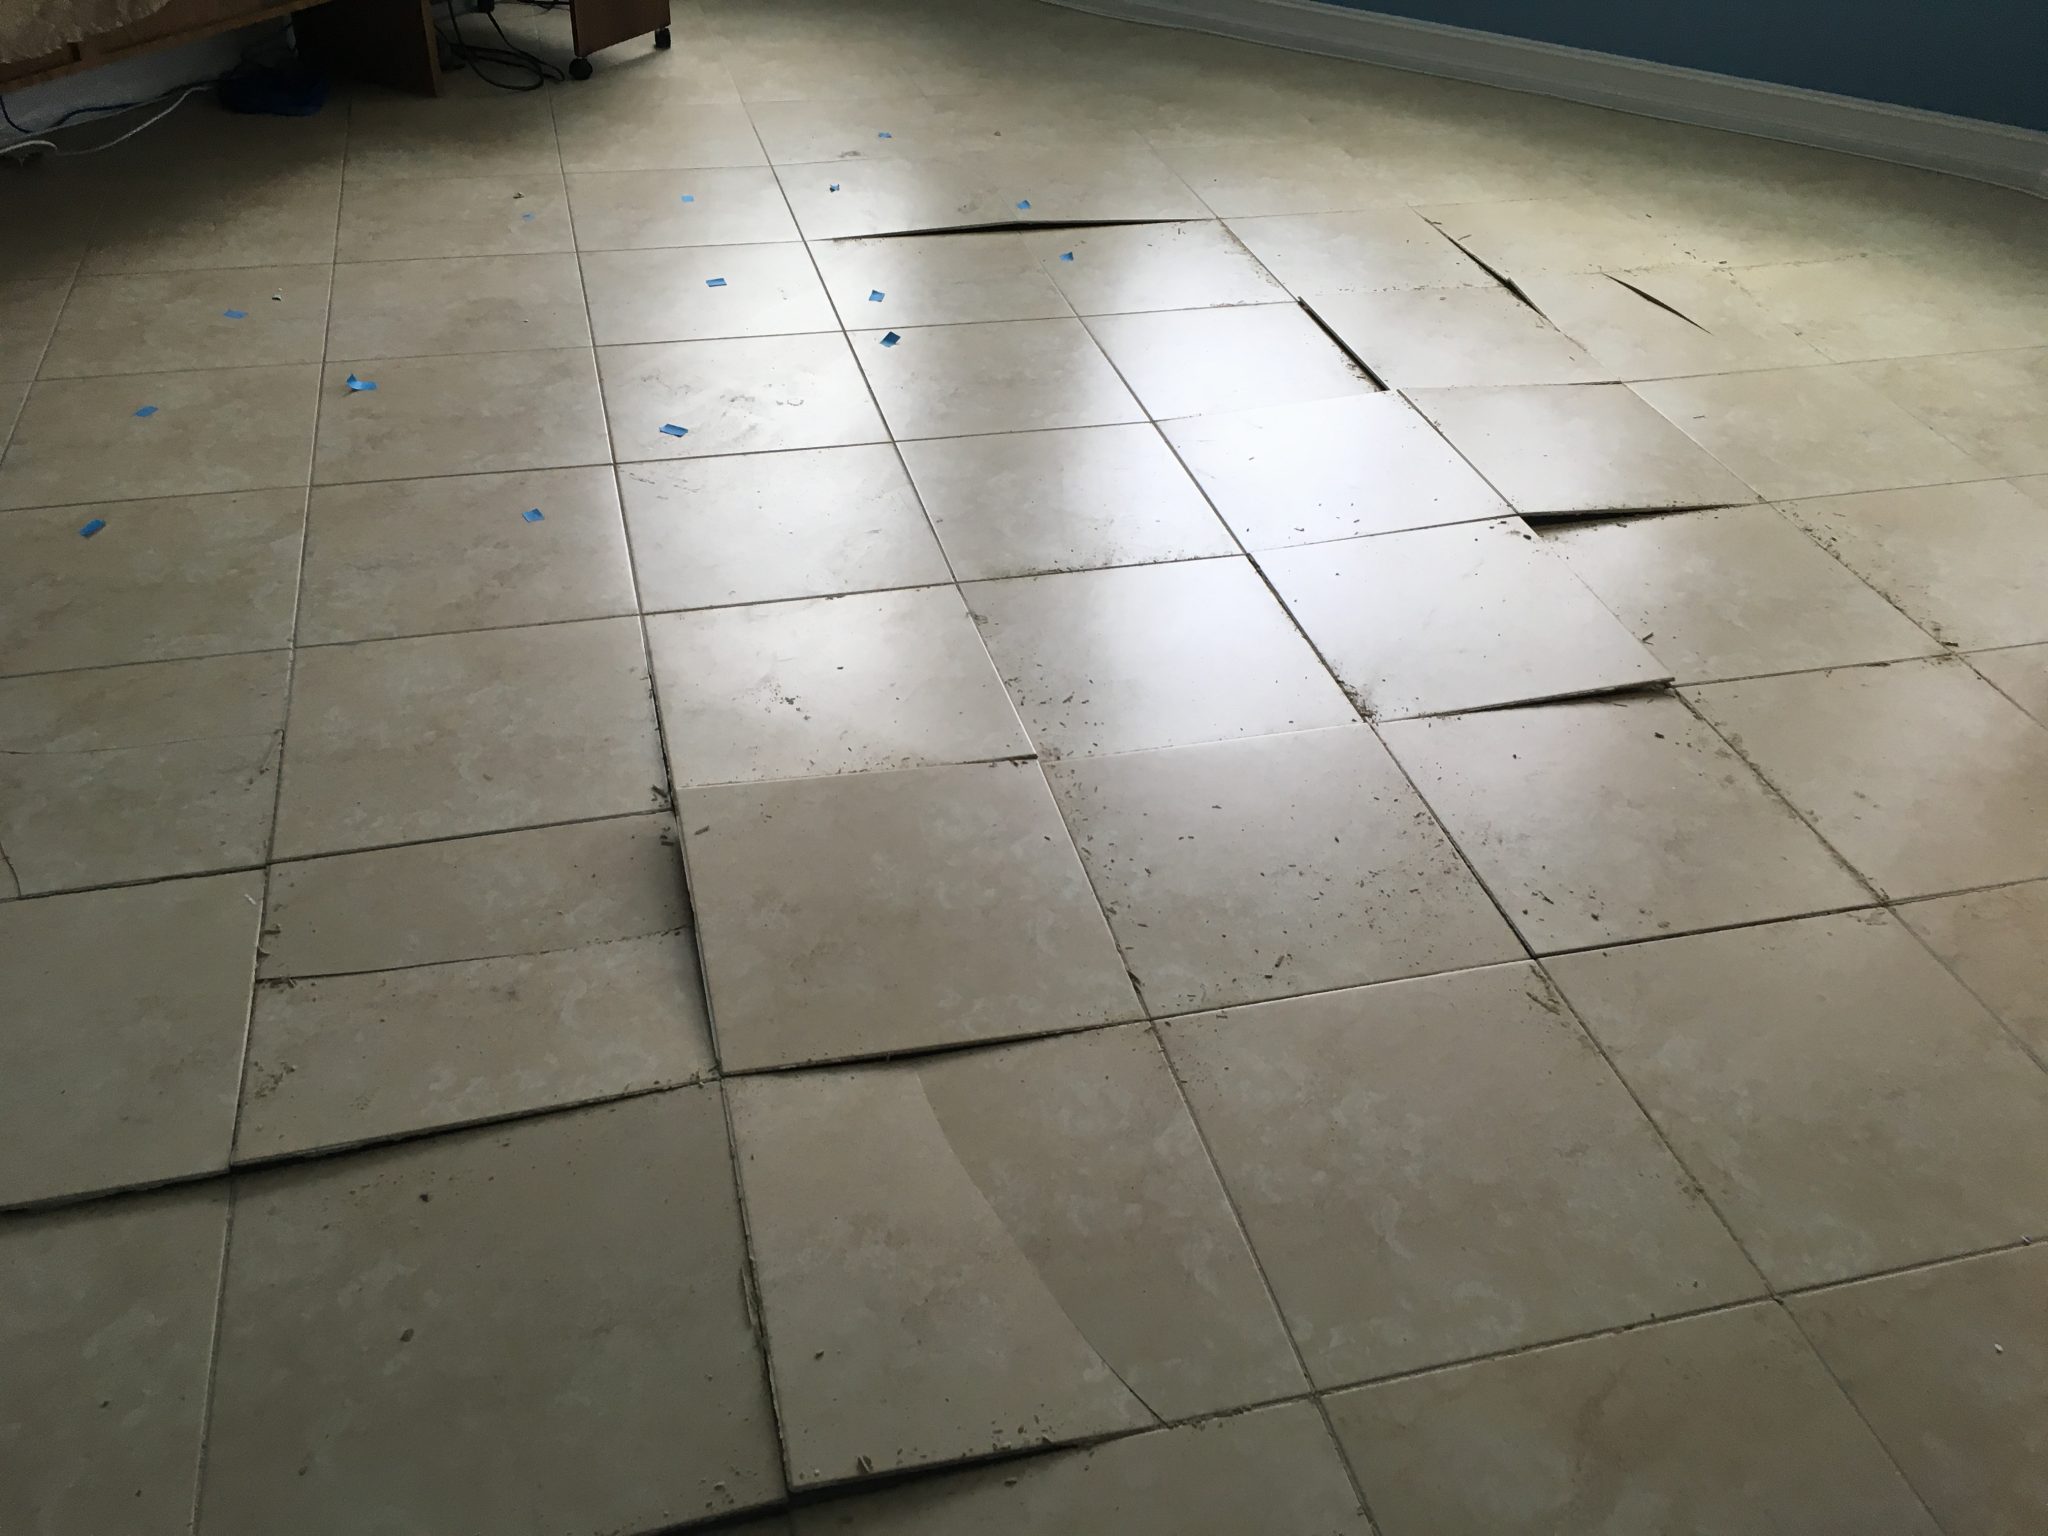
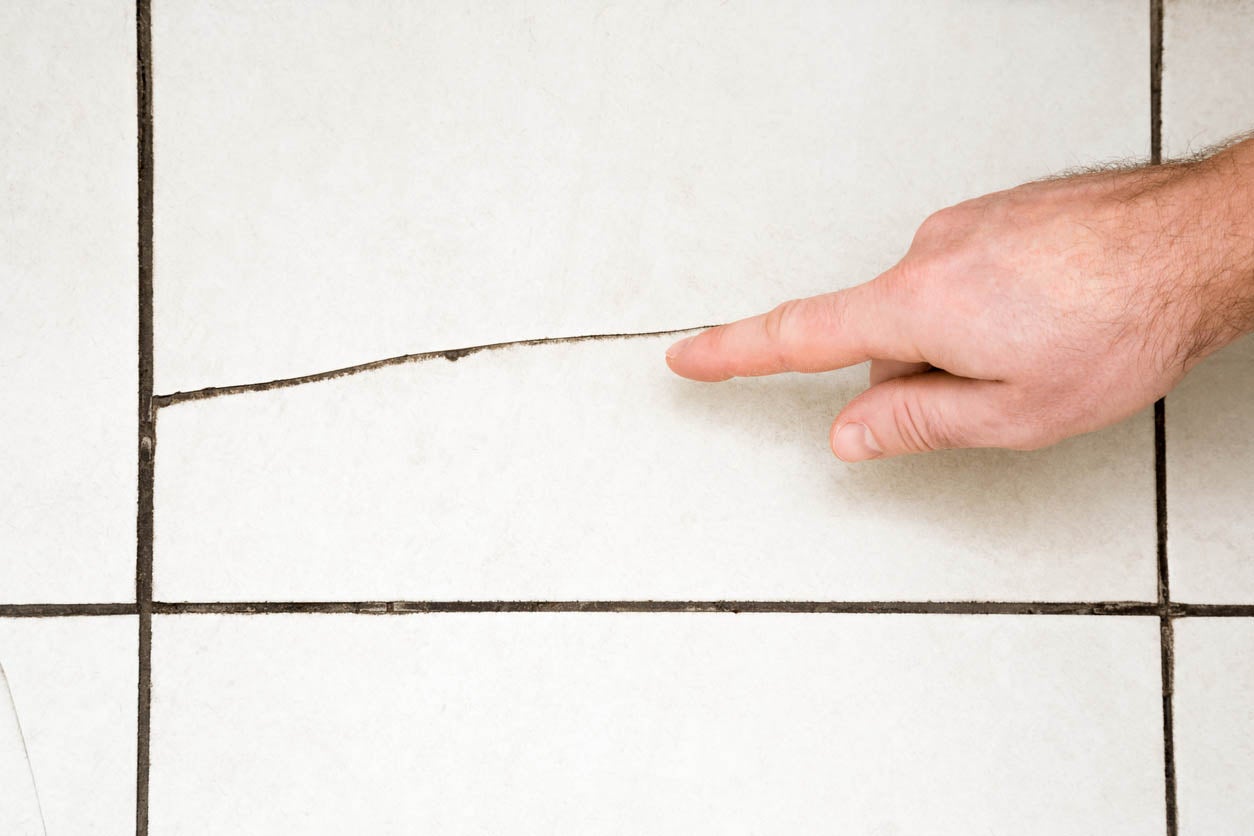
Assessing the Damage
Before you begin repairing a loose floor tile, it’s essential to assess the extent of the damage. This will help you determine the appropriate repair method and ensure a successful outcome.
Start by carefully inspecting the loose tile. Look for any signs of damage such as cracks, chips, or missing pieces. If the tile is severely damaged, it may not be salvageable, and you may need to consider replacing it altogether.
Next, check the surrounding tiles for any signs of looseness or damage. It’s important to address any underlying issues to prevent further tiles from becoming loose in the future. Use a flashlight to inspect the grout lines and look for any gaps or cracks.
Additionally, assess the stability of the subfloor beneath the loose tile. If the subfloor is weak or uneven, it may need to be repaired before proceeding with the tile repair. Uneven subfloors can cause tiles to become loose over time.
Once you’ve assessed the damage and identified any underlying issues, you’ll have a clearer understanding of the scope of the repair. This will help you plan and gather the necessary materials and tools for the job.
Gathering Materials and Tools
Now that you’ve assessed the damage and determined the repair method, it’s time to gather the materials and tools you’ll need for the job. Having everything prepared beforehand will make the repair process smoother and more efficient.
Here’s a list of materials and tools you’ll likely need:
- Replacement tile: If your loose tile is beyond repair or if you anticipate needing to replace it, make sure to find a matching replacement tile. This will ensure a seamless look once the repair is complete.
- Tile adhesive: Choose a high-quality adhesive that is suitable for your type of tile and subfloor. Consult with the manufacturer’s guidelines to ensure compatibility.
- Grout: If the grout around the loose tile is damaged or cracked, you may need to replace it. Match the color of the existing grout or choose a new color for a fresh look.
- Grout float: A grout float is used to apply and smooth the grout into the gaps between the tiles.
- Tile spacers: These small plastic wedges are used to maintain consistent spacing between tiles while the adhesive dries.
- Grout sealer: After the repair is complete and the grout has dried, apply grout sealer to protect it from stains and water damage.
- Trowel: A trowel is necessary for spreading the adhesive evenly on the subfloor.
- Hammer and chisel: These tools are used to gently remove the loose tile from its position.
- Bucket and sponge: You’ll need these to clean the area before and after the repair.
- Safety glasses and gloves: It’s important to protect yourself while working with tiles and adhesive.
Make sure to double-check your inventory and ensure that you have all the necessary materials and tools before starting the repair process. This will save you time and prevent any interruptions during the repair.
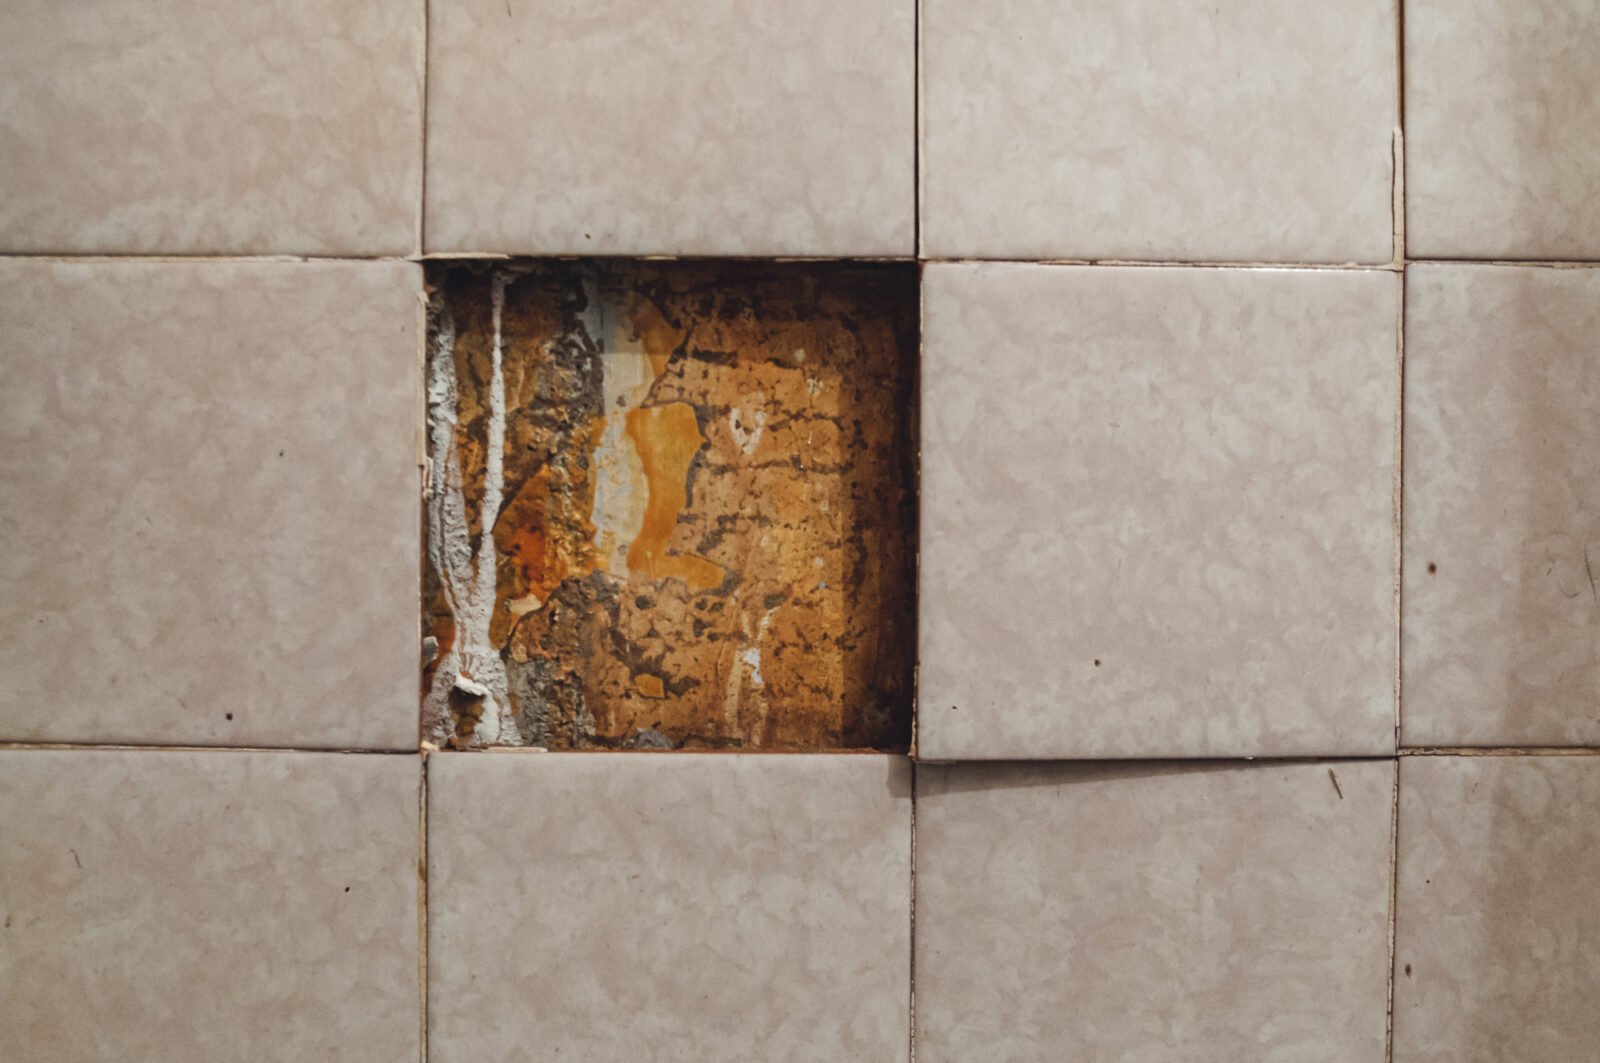
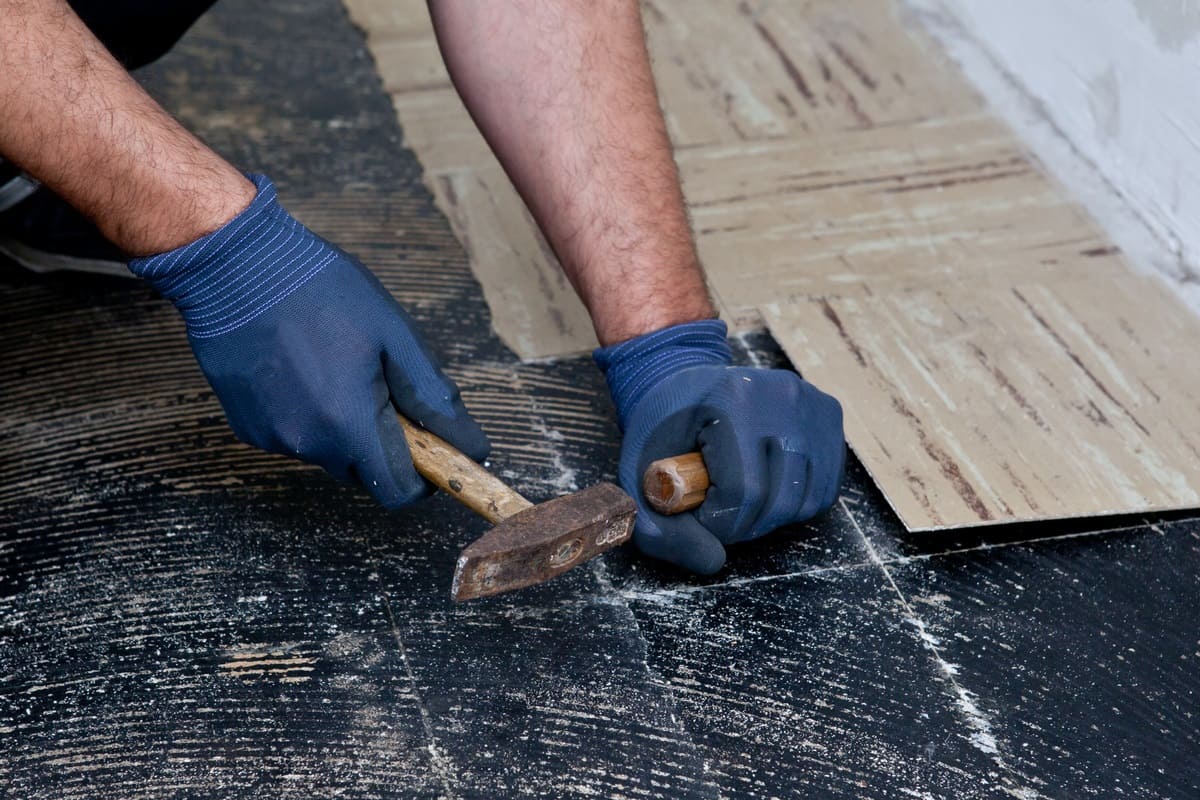
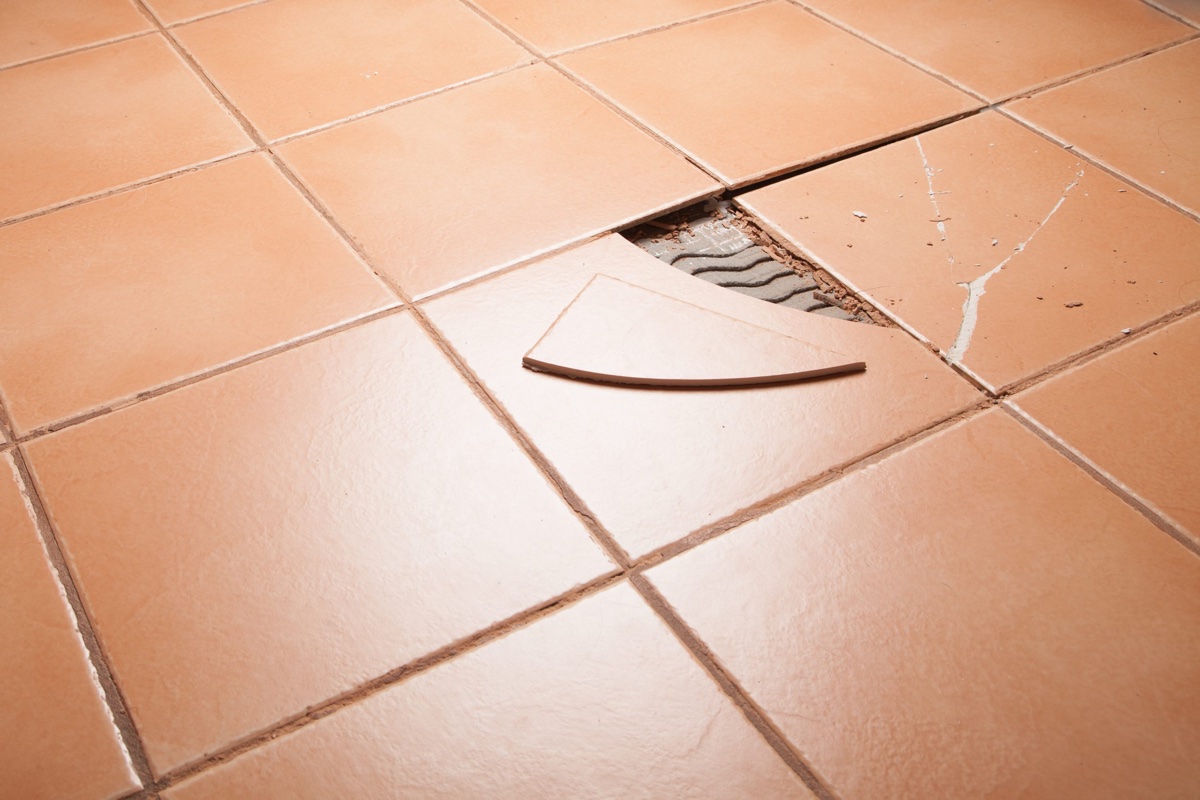
Removing the Loose Tile
With the materials and tools gathered, it’s time to remove the loose tile from its position. Follow these steps carefully to avoid damaging surrounding tiles or the subfloor.
- Put on your safety glasses and gloves to protect yourself.
- Take a hammer and gently tap the center of the loose tile to create cracks. Be cautious not to hit the tile too hard, as this can cause damage to surrounding tiles.
- Use a chisel to remove the broken pieces of the tile. Insert the chisel beneath the cracked tile and apply gentle pressure to lift it away from the subfloor.
- If the tile is still intact, insert the chisel at one of the edges and carefully pry it up until it is loose enough to be removed by hand. Again, be gentle to prevent further damage.
- Once the loose tile has been removed, clean the exposed subfloor using a bucket of water and a sponge. Remove any adhesive residue or debris to ensure a smooth surface for the new tile.
- Inspect the removed tile to determine if it can be repaired. If there are minor chips or cracks, you may be able to use tile filler or adhesive to fix it. However, if the damage is extensive, it’s best to replace the tile with a new one.
If you choose to repair the tile, follow the manufacturer’s instructions for the tile filler or adhesive. Allow sufficient time for it to dry and harden before proceeding with the reinstallation process.
Removing the loose tile is a critical step in the repair process, as it sets the foundation for the next steps. Take your time and handle the tile with care to ensure a successful repair.
Preparing the Surface
Now that the loose tile has been removed, it’s important to properly prepare the surface before proceeding with the repair. Preparing the surface ensures that the new tile will adhere correctly and create a strong bond with the subfloor.
Follow these steps to prepare the surface for the repair:
- Clean the exposed subfloor thoroughly. Use a damp sponge or cloth to remove any dust, dirt, or debris. This will provide a clean and smooth surface for the adhesive to adhere to.
- If there are any adhesive remnants from the previous tile, carefully scrape them off with a putty knife. Be cautious not to damage the subfloor or surrounding tiles in the process.
- Inspect the subfloor for any unevenness or bumps. If you notice any, use a sanding block or a leveler to smooth out the surface. A flat and level subfloor will ensure that the new tile sits evenly.
- If necessary, use a patching compound to fill in any cracks or gaps in the subfloor. Follow the manufacturer’s instructions and allow sufficient time for the compound to dry and cure before continuing the repair.
- Ensure that the area is completely dry before applying the tile adhesive. Moisture can hinder the adhesive’s ability to bond properly, so take the time to allow the surface to dry completely.
- Inspect the surrounding tiles and grout lines for any signs of damage or looseness. If you notice any issues, consider addressing them before proceeding with the repair. Repairing or replacing adjacent tiles will help prevent future problems.
Preparing the surface is a crucial step in ensuring a successful tile repair. Taking the time to clean, level, and properly inspect the subfloor will create an ideal foundation for the new tile to adhere to.
Use a high-quality adhesive to reattach loose floor tiles. Clean the area thoroughly, apply the adhesive, and press the tile firmly into place. Allow it to dry completely before walking on it.
Read more: How To Tile A Floor – In Easy Steps
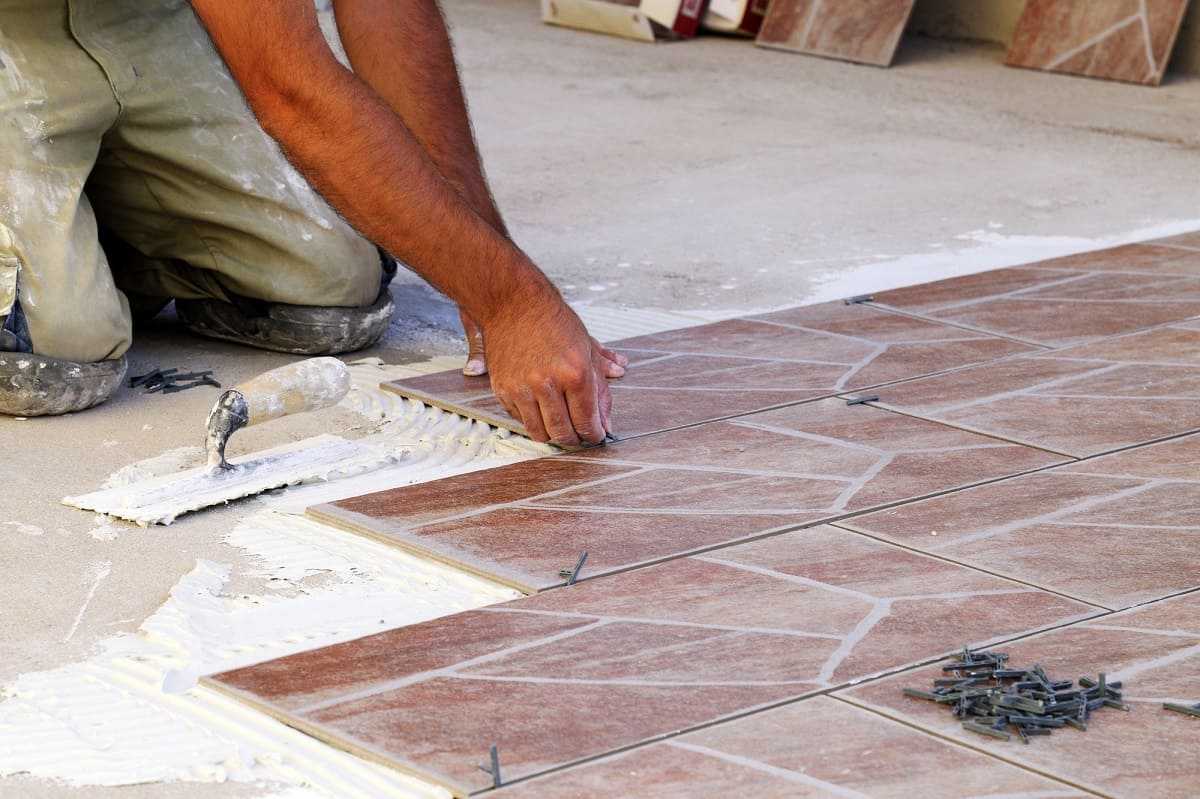
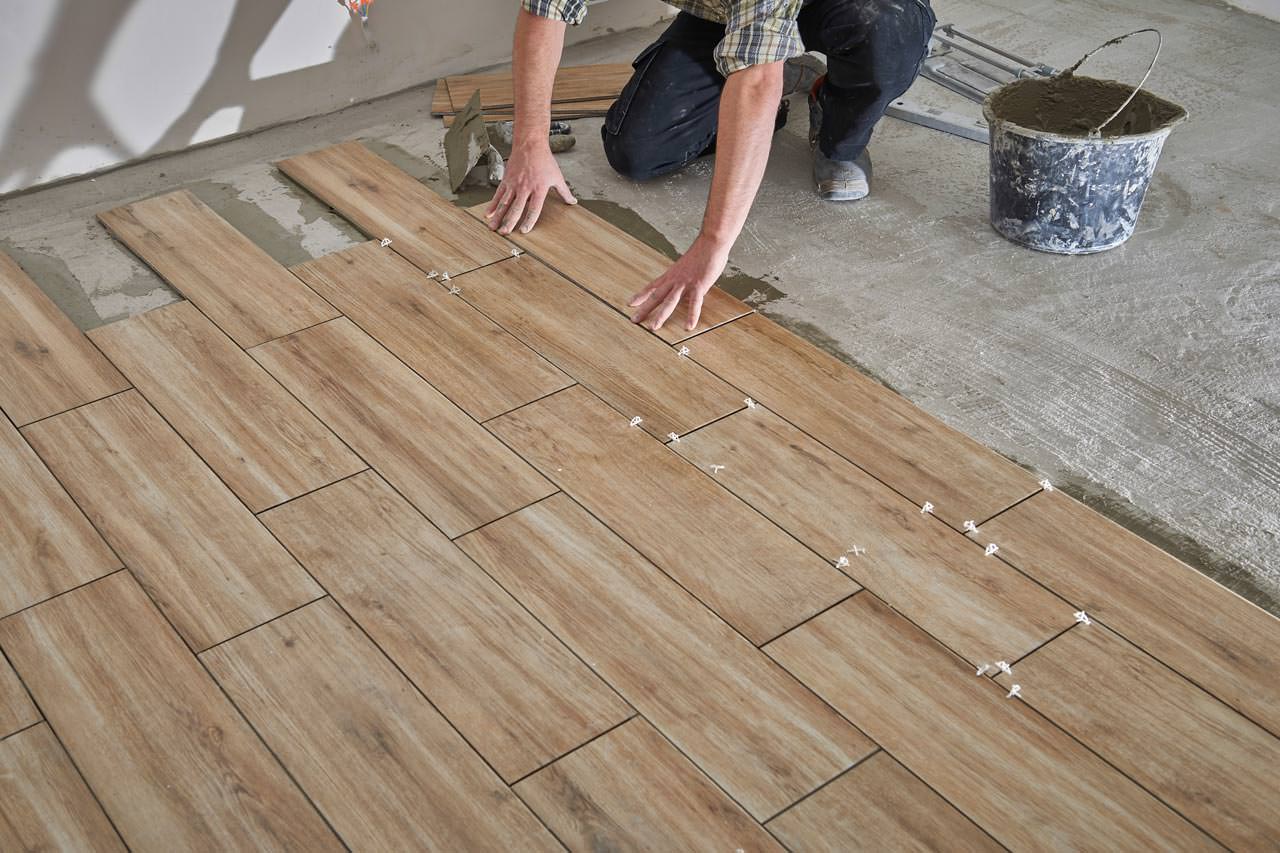
Applying Adhesive
After preparing the surface, it’s time to apply the adhesive that will secure the new tile in place. Properly applying the adhesive will ensure a strong and long-lasting bond.
Here is a step-by-step guide on how to apply adhesive for your tile repair:
- Read and follow the manufacturer’s instructions on the adhesive packaging. Different types of adhesives may have specific application guidelines, so it’s important to adhere to them for optimal results.
- Using a trowel, spread a thin layer of adhesive onto the prepared subfloor. Start by applying it to the center of the area where the tile will be placed.
- Hold the trowel at a 45-degree angle and use its notched edge to create ridges in the adhesive. This helps enhance the bonding surface and allows for better adhesion.
- Work in small sections to prevent the adhesive from drying too quickly. Only apply as much adhesive as you can work with at a time.
- Place the replacement tile into the adhesive, pressing it firmly and evenly. Wiggle the tile slightly to ensure it fully adheres to the adhesive and creates a strong bond.
- Use tile spacers to maintain consistent spacing between the newly installed tile and surrounding tiles. This will ensure a uniform appearance and adequate room for grouting.
- Continue applying adhesive and installing tiles, working your way towards the edges of the repair area. Cut tiles as needed to fit any irregular shapes or edges.
- Regularly check the level of the tiles using a level or straight edge. Adjust them as necessary to ensure they are properly aligned and flush with neighboring tiles.
- Allow the adhesive to dry according to the manufacturer’s instructions. This typically takes 24 to 48 hours. Avoid stepping on the newly installed tiles during this time to prevent displacement.
Applying the adhesive requires precision and attention to detail. Take your time during this step to ensure that the tiles are securely attached and properly aligned. This will lay the groundwork for a successful tile repair.
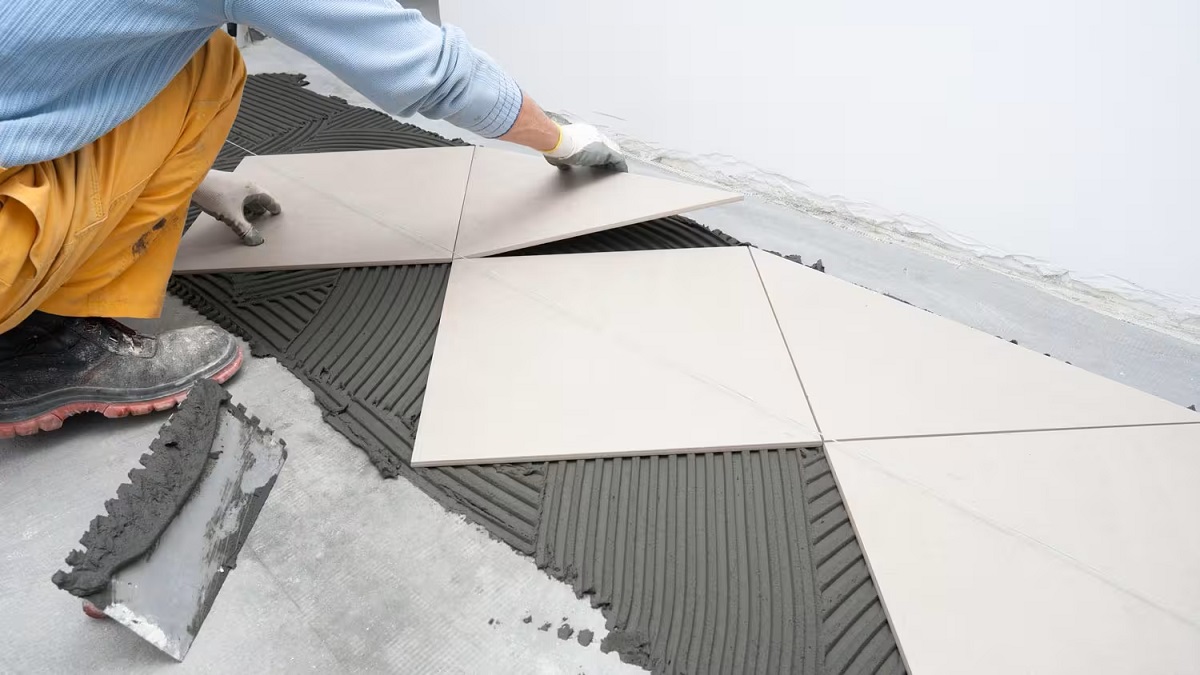
Reinstalling the Tile
With the adhesive properly applied and cured, it’s time to reinstall the tile and complete the repair. Reinstalling the tile involves careful placement and ensuring it is securely bonded to the adhesive.
Follow these steps to successfully reinstall the tile:
- Remove the tile spacers that were used to maintain consistent spacing. Gently pull them out from between the tiles.
- Inspect the adhesive to ensure it is fully cured. It should be firm and dry to the touch before proceeding.
- Apply a small amount of tile adhesive on the back of the replacement tile, focusing on the center and edges. This provides extra bonding strength.
- Position the tile in its designated spot, aligning it with the surrounding tiles. Press it firmly into place, applying even pressure across the entire surface of the tile.
- Wiggle the tile slightly to help it settle into the adhesive and create a secure bond. Ensure that the tile is level and flush with the surrounding tiles.
- Use a level or straight edge to check the alignment of the reinstalled tile. Adjust if necessary to ensure it is properly aligned and does not protrude or sink below the surrounding tiles.
- Wipe away any excess adhesive that may have squeezed out from under the tile. Use a damp cloth or sponge to clean the tile surface.
- Allow the adhesive to cure completely as per the manufacturer’s instructions. Avoid stepping on the tile or putting any weight on it during this time.
Reinstalling the tile requires patience and precision to ensure it is properly aligned and firmly bonded to the adhesive. Taking the time to do this step correctly will ensure a successful repair that will last for years to come.
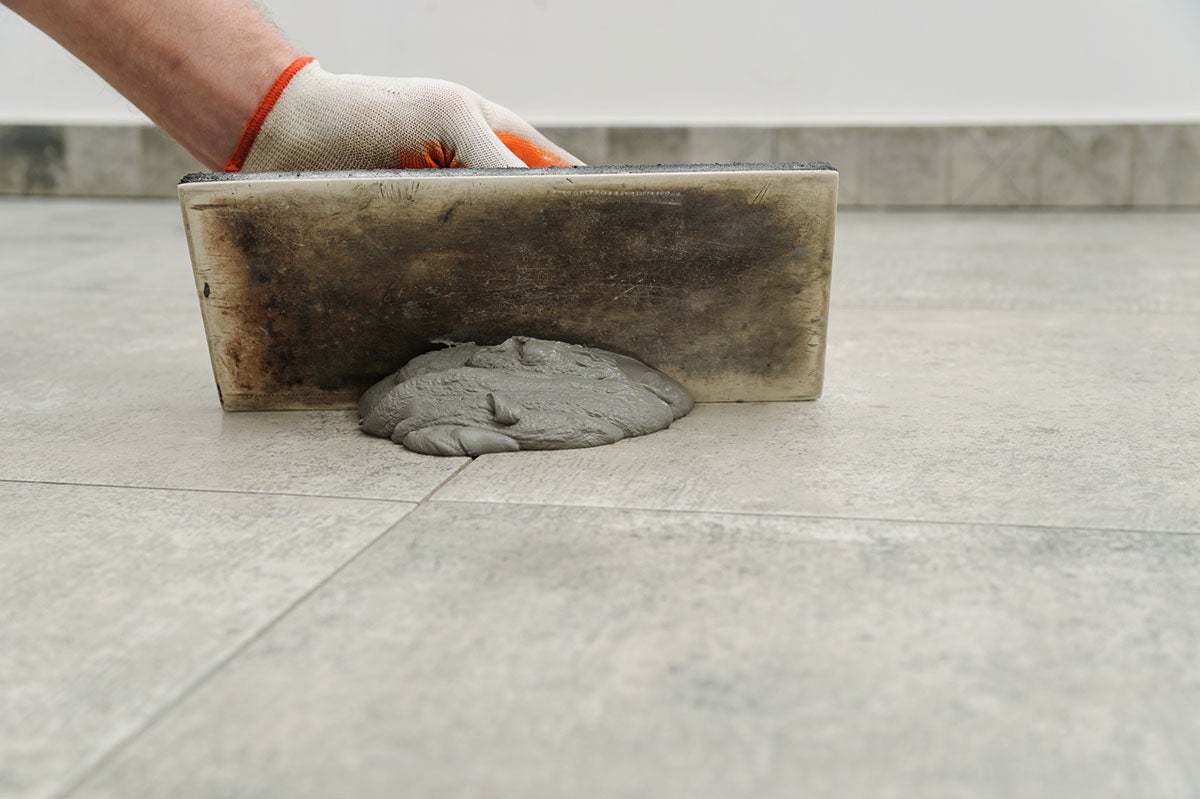
Leveling and Grouting
Once the tile is securely reinstalled, the next step is to level the surface and apply grout. Leveling the tiles will ensure a smooth and even finish, while grouting fills in the gaps, adds stability, and enhances the overall appearance.
Follow these steps for leveling and grouting:
- Inspect the surface to identify any unevenness or height discrepancies between the tiles. If necessary, use a rubber mallet and a wood block to gently tap down any tiles that may be slightly raised.
- Level the tiles by running a level or straight edge across them. Adjust any tiles that are not flush with the others, either by tapping them down or adding adhesive to lift them up.
- Prepare the grout according to the manufacturer’s instructions. Ensure that you choose a grout color that complements your tiles and desired aesthetic.
- Using a grout float, apply the grout to the gaps between the tiles. Hold the float at a 45-degree angle and press the grout firmly into the gaps, making sure they are completely filled.
- Work in small sections and remove any excess grout from the tile surface using the float or a damp sponge. Wipe diagonally across the tiles to avoid pulling grout out of the gaps.
- Allow the grout to set for a few minutes, then use a damp sponge to gently wipe away any remaining grout haze from the tile surface. Rinse the sponge frequently and wring out excess water to avoid adding moisture to the grout.
- Leave the grout to cure for the recommended time specified by the manufacturer. Avoid walking on the tiles or exposing them to excess moisture during this period.
- After the grout has fully cured, buff the tiles with a dry cloth to remove any residual grout haze and bring out their natural shine.
Leveling the tiles and applying grout adds the final touches to your repair, ensuring a polished and professional finish. Taking your time during this step will create a visually pleasing result that will enhance the overall appearance of your floor.
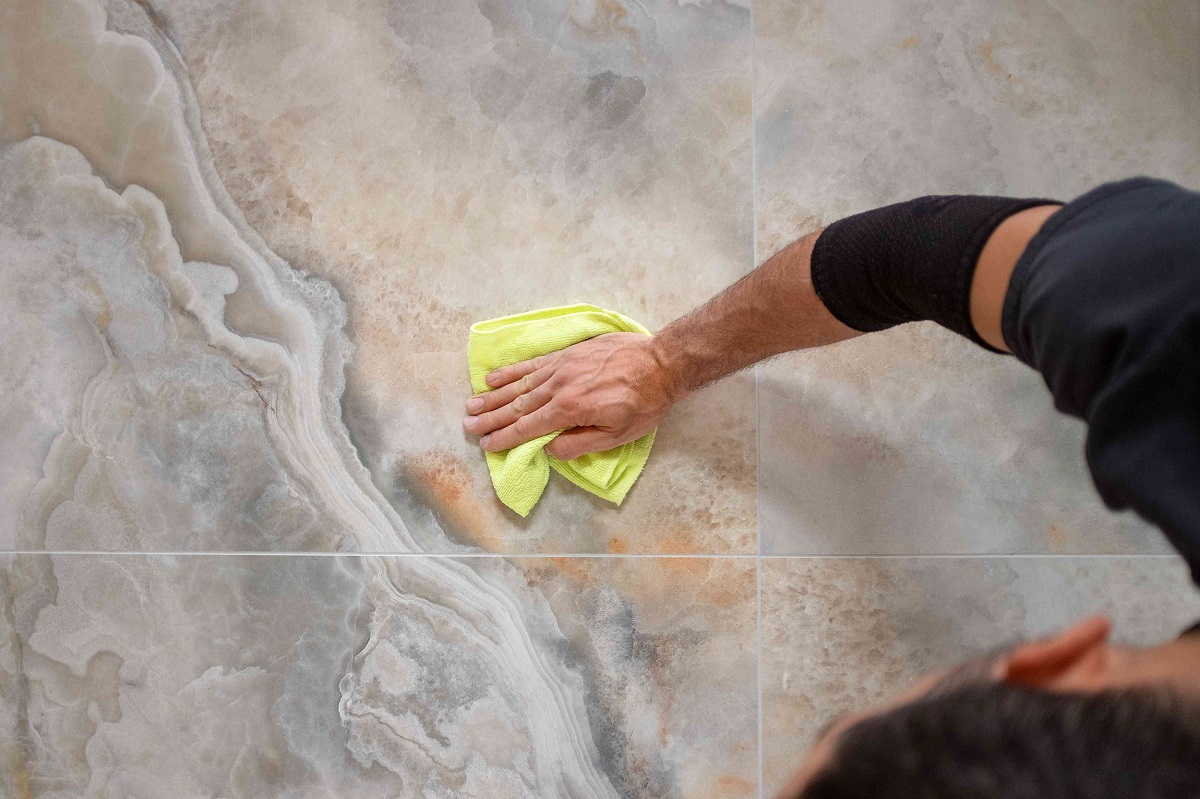
Cleaning and Finishing
With the leveling and grouting complete, the final step is to clean the tile surface and apply any finishing touches. Cleaning ensures that the tiles are free from grout residue and any remaining debris, while finishing adds an extra layer of protection and enhances the overall appearance of your repaired floor.
Follow these steps for cleaning and finishing:
- Using a damp sponge or cloth, gently wipe the tile surface to remove any remaining grout residue. Be careful not to disturb the freshly applied grout.
- Allow the grout to fully cure according to the manufacturer’s instructions before proceeding with any additional cleaning.
- Once the grout has cured, use a grout sealer to protect the grout from stains and water damage. Apply the sealer using a small brush or roller, following the instructions provided on the sealer packaging. Allow the sealer to dry completely.
- Inspect the repaired area for any remaining debris or dust. Sweep or vacuum the floor to remove any loose particles.
- If desired, apply a tile and grout cleaner to further clean and enhance the appearance of the tiles. Follow the instructions on the cleaner packaging, and use a scrub brush or mop to thoroughly clean the floor surface.
- Rinse the floor with clean water to remove any residual cleaner. Use a mop or sponge to ensure that all cleaner residue is thoroughly removed.
- Once the floor is clean and dry, consider applying a tile and grout sealer to protect the tiles and grout from future stains and damage. This will help maintain the longevity and appearance of your repaired floor.
- Finally, give your repaired floor a final inspection and admire the result of your hard work. Enjoy the refreshed and renewed look of your beautifully repaired tiles.
Cleaning and finishing are essential steps to complete the tile repair process. By following these steps, you’ll not only ensure the cleanliness and durability of your repaired floor but also enhance its overall aesthetic appeal.
Read more: How To Lay A Ceramic Tile Floor
Conclusion
Repairing loose floor tiles is a relatively straightforward process that can save you both time and money. By following the step-by-step guide outlined in this article, you can successfully repair and restore the integrity of your floor.
Start by assessing the damage and gathering the necessary materials and tools. Remove the loose tile carefully, ensuring that the surface is adequately prepared for the repair. Apply the adhesive, reinstall the tile, and level and grout the area. Finish the process by cleaning the tiles and applying any necessary sealants.
Throughout the repair process, it’s important to prioritize safety and attention to detail. Take your time, follow the manufacturer’s instructions for the materials and tools used, and ensure the tiles are properly aligned and bonded.
If you’re unsure about your DIY skills or if you have a large area of loose tiles, it’s always best to consult a professional. They can provide expert guidance and ensure a seamless and long-lasting repair.
By repairing loose floor tiles, you not only enhance the appearance of your floor but also create a safer environment in your home. Loose tiles can be a tripping hazard, especially in high-traffic areas. Additionally, addressing the issue promptly can prevent further damage and protect the underlying subfloor.
Remember, regular maintenance and prompt repairs are essential in preserving the longevity and beauty of your tiles. By taking care of minor issues as they arise, you can avoid larger and costlier repairs down the line.
With the knowledge and guidance provided in this article, you have the tools to confidently repair loose floor tiles. So, roll up your sleeves, gather your materials, and transform your floor into a stunning and secure space once again.
Frequently Asked Questions about How To Repair Loose Floor Tiles
Was this page helpful?
At Storables.com, we guarantee accurate and reliable information. Our content, validated by Expert Board Contributors, is crafted following stringent Editorial Policies. We're committed to providing you with well-researched, expert-backed insights for all your informational needs.


0 thoughts on “How To Repair Loose Floor Tiles”