
Furniture
How To Make A Chandelier Out Of Paper
Modified: January 18, 2024
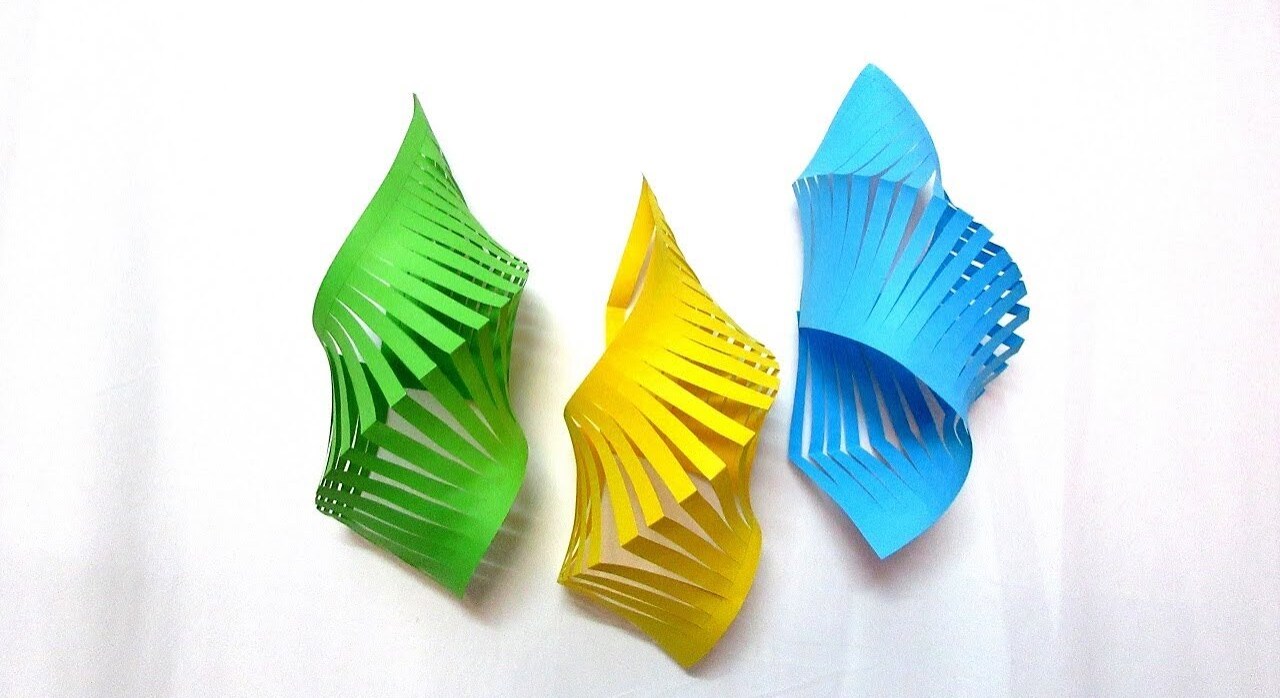
Learn how to create a stunning paper chandelier for your home decor. Transform your space with this DIY furniture project and add a touch of elegance.
(Many of the links in this article redirect to a specific reviewed product. Your purchase of these products through affiliate links helps to generate commission for Storables.com, at no extra cost. Learn more)
Introduction
Welcome to the fascinating world of DIY décor! If you’re looking to add a touch of elegance and creativity to your living space, a homemade paper chandelier might be just what you need. Not only will it serve as a unique and eye-catching centerpiece, but it will also allow you to showcase your artistic abilities.
In this step-by-step guide, we will walk you through the process of creating your very own chandelier out of paper. With a few simple materials and a dash of creativity, you can transform any room into a stunning and personalized space.
Whether you’re a seasoned craft enthusiast or a beginner looking for a fun project, this DIY paper chandelier is perfect for you. So, let’s dive in and unleash our inner artist!
Key Takeaways:
- Unleash Your Creativity: Crafting a homemade paper chandelier allows you to showcase your artistic abilities and add a touch of elegance to any space, making it a fun and rewarding DIY project for all skill levels.
- Personalized Elegance: With just a few materials and a dash of creativity, you can transform any room into a stunning and personalized space with a DIY paper chandelier, adding a unique and eye-catching centerpiece to your decor.
Read more: How To Make A Frisbee Out Of Paper
Materials Needed
Before we get started, let’s gather all the materials you’ll need to create your paper chandelier:
- Cardstock or heavy paper: Choose a variety of colors or patterns that complement your decor style.
- Scissors: Make sure they’re sharp and precise for clean cuts.
- Template or stencil: This is optional, but it can be helpful if you prefer a specific chandelier design.
- Adhesive: You can use glue, double-sided tape, or a glue gun to assemble the paper pieces.
- String or ribbon: This will be used to attach the chandelier to the frame and hang it from the ceiling.
- Chandelier frame: You can purchase a pre-made frame from a craft store or create your own using wire or any sturdy material.
- Decorative elements: Optional embellishments such as beads, feathers, or crystals can add an extra touch of elegance.
- Scrap paper or cardboard: This will be used as a work surface and to protect your work area from adhesive.
- Optional tools: If you have a cutting machine like a Cricut or Silhouette, it can save you time and add precision to your cuts.
Make sure to gather all the materials and set them up in a well-lit and spacious area. Now that you’re prepared with everything, let’s move on to the next step of designing your chandelier.
Step 1: Designing Your Chandelier
The first step in creating your paper chandelier is to decide on the design. Take some time to brainstorm and visualize how you want your chandelier to look. Consider the overall style and theme of your space, as well as any specific colors or patterns you want to incorporate.
If you’re not comfortable designing from scratch, you can find templates or stencils online or at your local craft store. These can be a helpful starting point and provide guidance for cutting and assembling the paper pieces.
Once you have a design in mind, you can sketch it out on paper or use a computer software to create a digital version. This will give you a clear idea of how the final chandelier will look and help you make any necessary adjustments before starting the cutting process.
Remember to consider the size of your chandelier as well. Measure the space where you plan to hang it to ensure it’s the right fit. You can scale your design accordingly or make adjustments during the cutting and assembly process.
Once you’re satisfied with your design, it’s time to move on to the next step: gathering your supplies.
Step 2: Gathering Supplies
Now that you have your chandelier design in mind, it’s time to gather all the necessary supplies. Make sure you have everything on hand before proceeding.
Start by selecting the right paper for your chandelier. Cardstock or heavy paper works best as it is durable and holds its shape well. Choose a variety of colors or patterns that align with your design and complement your space. The paper can be easily found at any craft supply store or ordered online.
Next, make sure you have a good pair of scissors. Sharp and precise scissors will ensure clean and accurate cuts, resulting in a professional-looking chandelier. If you have a cutting machine like a Cricut or Silhouette, you can use it to automate the cutting process and achieve even more intricate designs.
If you are using a template or stencil, print or trace it onto the cardstock to guide your cutting. This will help maintain consistency and give your chandelier a polished look. You can find templates online or create your own based on your design.
Don’t forget the adhesive! Whether you prefer glue, double-sided tape, or a glue gun, choose the option that is most convenient and effective for you. Keep in mind that different adhesives have varying drying times, so plan accordingly.
Additionally, you will need string or ribbon to attach the chandelier to the frame and hang it from the ceiling. Opt for a color that blends well with your design or choose a transparent one for a subtle effect.
Lastly, consider any additional decorative elements you want to incorporate into your chandelier. This could include beads, feathers, crystals, or any other embellishments that will enhance the overall aesthetic. Make sure to have these items ready for the assembly process.
With all your supplies gathered, you’re one step closer to creating your stunning paper chandelier. In the next step, we will dive into cutting the paper pieces.
Step 3: Cutting the Paper
Now that you have your design and supplies ready, it’s time to start cutting the paper to create the pieces for your chandelier. This step requires precision and attention to detail, so take your time and ensure accurate cuts.
If you are using a template or stencil, place it on top of the cardstock and trace the design using a pencil or pen. Make sure to trace along the edges carefully to capture all the intricate details. If you’re confident in your cutting skills, you can skip the tracing step and directly cut along the template.
If you prefer a more free-form approach, you can also sketch your design directly onto the cardstock and carefully cut along the lines. This allows for more creativity and adaptability in the shape and size of each piece.
When cutting the paper, it’s essential to use sharp scissors and make clean, precise cuts. This will ensure that the pieces fit together seamlessly when assembled. Take your time and follow the lines as closely as possible for a professional finish.
Remember to consider the number of pieces you need to cut for your design and the size of each piece. You may want to create a master template or stencil to use as a guide to ensure consistency across all the pieces.
If you are using a cutting machine, follow the instructions for loading the cardstock and setting up the design. Allow the machine to do the cutting work for you, ensuring accuracy and efficiency.
Once you have cut all the paper pieces according to your design, it’s time to move on to the next step: folding and assembling the paper pieces.
When making a paper chandelier, use sturdy cardstock or construction paper for durability. Consider using a template to ensure uniformity in your paper cuts and folds.
Read more: How To Make Small Boxes Out Of Paper
Step 4: Folding and Assembling the Paper Pieces
Now that you have all the paper pieces cut, it’s time to start folding and assembling them to bring your chandelier to life. This step requires patience and precision to ensure that each piece fits together seamlessly.
Begin by folding any necessary creases or tabs on the paper pieces. This will give them structure and make them easier to assemble. Use a ruler or bone folder to create crisp folds along the designated lines.
If your design includes tabs that need to be attached to one another, apply a small amount of adhesive to the tab and press it firmly against the corresponding piece. Hold it in place for a few seconds to allow the adhesive to bond. Repeat this process for all the tabs in your design.
If your design involves intricate folds or assembly steps, it may be helpful to refer to your sketch or template for guidance. Take your time and follow the instructions to ensure that you are assembling the pieces correctly.
As you assemble the paper pieces, periodically check to make sure they form the desired shape and that they are aligned properly. Adjust any misaligned pieces as you go to maintain the overall structure and balance of the chandelier.
It’s important to note that some designs may require additional support or reinforcement. If necessary, you can attach small strips of cardstock or glue small paper reinforcements to strengthen the connections between the pieces.
Continue assembling the paper pieces until your chandelier starts taking shape. Step back occasionally to get a sense of how it looks from a distance and make any necessary adjustments.
Once you have completed the assembly of all the paper pieces, you’re ready to move on to the next step: attaching the paper pieces to the frame.
Step 5: Attaching the Paper Pieces to the Frame
Now that your paper pieces are assembled, it’s time to attach them to the chandelier frame. This step will help give your paper chandelier structure and stability.
Start by assessing your chandelier frame. If you are using a pre-made frame, make sure it’s clean and free from any dust or debris. If you are creating your own frame using wire or other materials, ensure that it is sturdy and securely assembled.
Attach the paper pieces to the frame using adhesive. Place a small amount of adhesive on each piece’s tab or designated area and press it firmly against the frame. Hold it in place for a few moments to allow the adhesive to bond.
Take care to distribute the paper pieces evenly around the frame to maintain balance and symmetry. You can reference your design or template to guide the placement of each piece.
If your chandelier has multiple layers or tiers, start by attaching the bottom layer first and then build upward. This will ensure that the pieces are securely attached, and your chandelier maintains its overall shape.
As you attach the paper pieces, periodically step back and assess the chandelier’s appearance. Make any necessary adjustments to ensure that the pieces are aligned correctly and that the overall structure is balanced.
If your chandelier has any hanging elements, such as crystals or beads, attach them to the frame at this stage. This will add an extra touch of glamour and elegance to your paper chandelier.
Once all the paper pieces are securely attached to the frame and any additional elements are in place, your paper chandelier is almost complete! The next step will involve adding decorative elements to enhance its visual appeal.
Step 6: Adding Decorative Elements
Now that the structure of your paper chandelier is complete, it’s time to add some decorative elements to elevate its visual appeal. This step allows you to personalize your chandelier and make it truly unique.
Consider the overall style and theme of your space when choosing decorative elements. You can opt for beads, feathers, crystals, or any other embellishments that align with your design aesthetic.
Using adhesive, attach these decorative elements to the paper pieces of your chandelier. You can strategically place them to highlight specific areas or create a cascading effect.
Ensure that the adhesive is strong enough to hold the decorative elements in place without damaging the paper or compromising the overall structure of the chandelier.
Another option is to incorporate additional paper cutouts or shapes into your chandelier design. You can create accents or patterns using different colored or patterned paper. Attach these pieces to the existing paper pieces or to the frame for a layered effect.
Take your time during this step to experiment with different placement options and combinations of decorative elements. Step back occasionally to assess the visual impact of the added elements and make any necessary adjustments.
Remember, the goal is to enhance the overall aesthetic of your paper chandelier and make it shine. Don’t be afraid to get creative and let your personal style shine through in this step!
Once you are satisfied with the placement of the decorative elements, it’s time to move on to the final step: hanging and enjoying your paper chandelier.
Step 7: Hanging and Enjoying Your Paper Chandelier
Congratulations! You’ve reached the final step of creating your paper chandelier. Now it’s time to hang it up and enjoy the beautiful centerpiece you’ve created.
Start by selecting the perfect location to hang your chandelier. Consider the size of the space, the height of the ceiling, and the overall aesthetic you want to achieve. Whether it’s a dining room, living room, or bedroom, choose a spot where your chandelier can be the focal point.
Before hanging, make sure you have a secure attachment point. You can use a hook, a ceiling fixture, or any other suitable mounting system. Ensure that it is capable of supporting the weight of your chandelier and that it is properly secured.
If your chandelier has a string or ribbon for hanging, attach it securely to the frame and use it to suspend the chandelier from the hook or mounting point. Make any necessary adjustments to ensure that the chandelier is level and centered.
Step back and admire your handiwork. It’s incredible to see how a few pieces of paper can transform into a stunning, homemade chandelier that adds a touch of elegance to your space.
Now is the time to bask in the ambience and enjoy the warm glow that your paper chandelier provides. Whether you’re hosting a gathering with loved ones or simply relaxing in the evening, your chandelier will create a cozy and inviting atmosphere.
Remember, over time, the paper may become dusty or collect particles. Take the time to regularly clean your chandelier gently using a feather duster or a soft cloth to maintain its pristine appearance.
Additionally, if you ever feel like changing up the look of your chandelier, you can easily do so by replacing the paper pieces or adding new decorative elements. Let your creativity flow and continue to customize your chandelier as you see fit.
Congratulations again on the completion of your DIY paper chandelier. It’s a true testament to your creativity and craftsmanship. Now sit back, relax, and enjoy the beauty you’ve brought into your living space!
With the completion of Step 7, you have successfully created and hung your paper chandelier. This DIY project allows you to showcase your artistic abilities while adding a touch of elegance and charm to any room. Whether you’re a crafting enthusiast or a beginner, this project is both fun and rewarding. So go ahead, gather your materials, design your chandelier, cut and assemble the paper pieces, attach them to the frame, add decorative elements, and hang it up to enjoy the mesmerizing beauty of your homemade paper chandelier.
Happy crafting and enjoy the spotlight your paper chandelier brings to your space!
Read more: How To Make May Day Baskets Out Of Paper
Conclusion
Creating a paper chandelier is not only a fun and engaging DIY project but also a wonderful way to add a touch of elegance and creativity to your living space. By following these step-by-step instructions, you have learned how to design, cut, assemble, and decorate your very own homemade chandelier.
The process of designing and crafting a paper chandelier allows you to express your artistic abilities and showcase your personal style. Whether you prefer a simple and minimalist design or a more intricate and embellished chandelier, the possibilities are endless.
Throughout this project, you have learned how to select the right materials, carefully cut the paper pieces, assemble them into a cohesive structure, and add decorative elements to enhance its visual appeal. The result is a stunning centerpiece that can transform any room into a cozy and inviting space.
Remember, don’t be afraid to get creative and add your own unique twists to the design. Experiment with different colors, patterns, and textures to make your chandelier truly one-of-a-kind.
Now, it’s time to proudly hang your handmade paper chandelier and bask in the warm glow it provides. Whether you’re hosting a dinner party, enjoying a quiet evening at home, or simply appreciating the beauty of your living space, your chandelier will add an eye-catching element that is sure to impress.
So gather your materials, let your imagination run wild, and embark on the journey of creating your very own paper chandelier. Get ready to unleash your inner artist and enjoy the delightful ambiance it brings to your home.
Happy crafting!
Frequently Asked Questions about How To Make A Chandelier Out Of Paper
Was this page helpful?
At Storables.com, we guarantee accurate and reliable information. Our content, validated by Expert Board Contributors, is crafted following stringent Editorial Policies. We're committed to providing you with well-researched, expert-backed insights for all your informational needs.





0 thoughts on “How To Make A Chandelier Out Of Paper”